Chapter 1: Unboxing & checking components
Before you begin the assembly, unbox your DryBase kit and verify that all components are present. Lay everything out on a clean, flat surface.
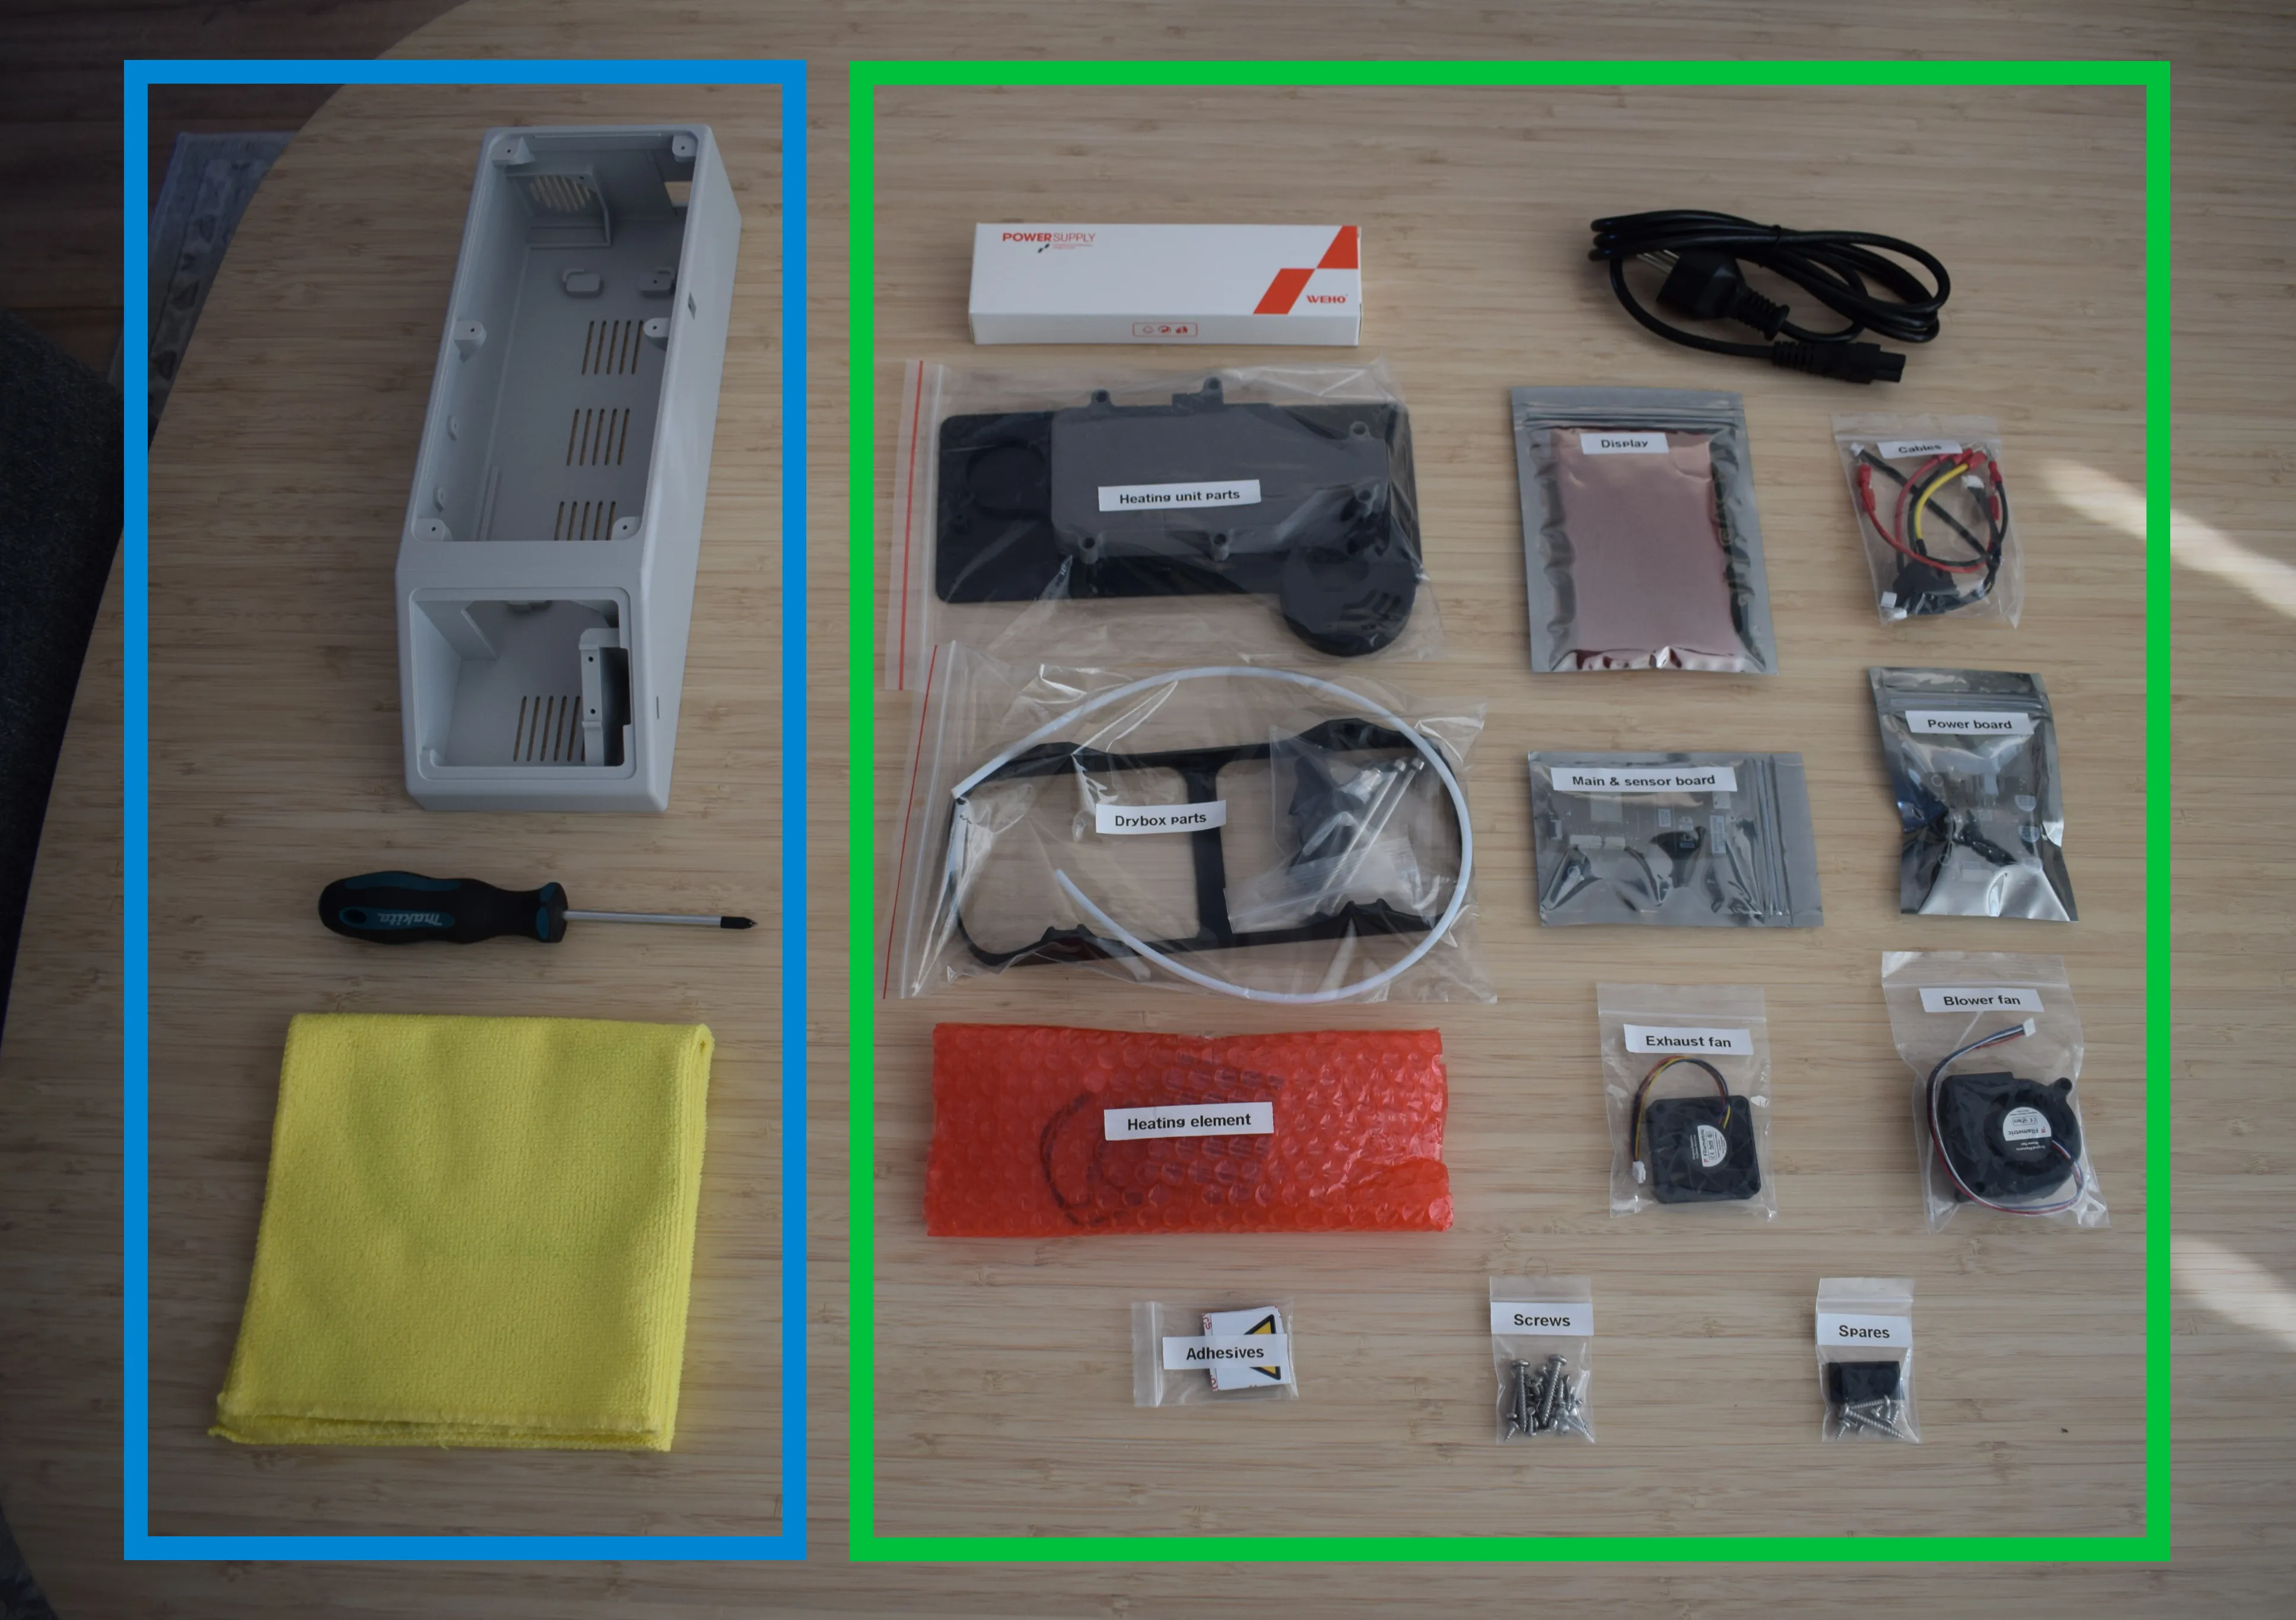
The image above is divided into two sections. The blue box on the left shows what you need to provide yourself. The green box on the right shows everything included in your kit.
What you need to provide
- DryBase housing (3D-printed; see the 3D Printing guide for material requirements)
- Phillips screwdriver
- 2mm hex/allen key
- Microfiber cloth (for handling components)
What's included in your kit
From left to right, top to bottom:
- 150W Power Supply Unit (PSU)
- C5 1.5m power cord (region-specific)
- Heating unit parts (bag)
- Display (bag)
- Cables (bag)
- Drybox parts (bag)
- Main & sensor board (bag)
- Power board (bag)
- Heating element (bag)
- Exhaust fan (bag)
- Blower fan (bag)
- Adhesives (bag)
- Screws / fasteners (bag)
- Spares (bag)
Missing or damaged parts?
Contact us at support@filametric.com with your order number and a photo of the issue before proceeding.
Chapter 2: Preparing the housing