Chapter 6: Drybox assembly
In this chapter you will modify the cereal container to work with your DryBase. This chapter takes roughly 15-30 minutes to complete. By the end of this chapter, your DryBase will be ready for use, including printing directly from the container while drying.
Compatible containers
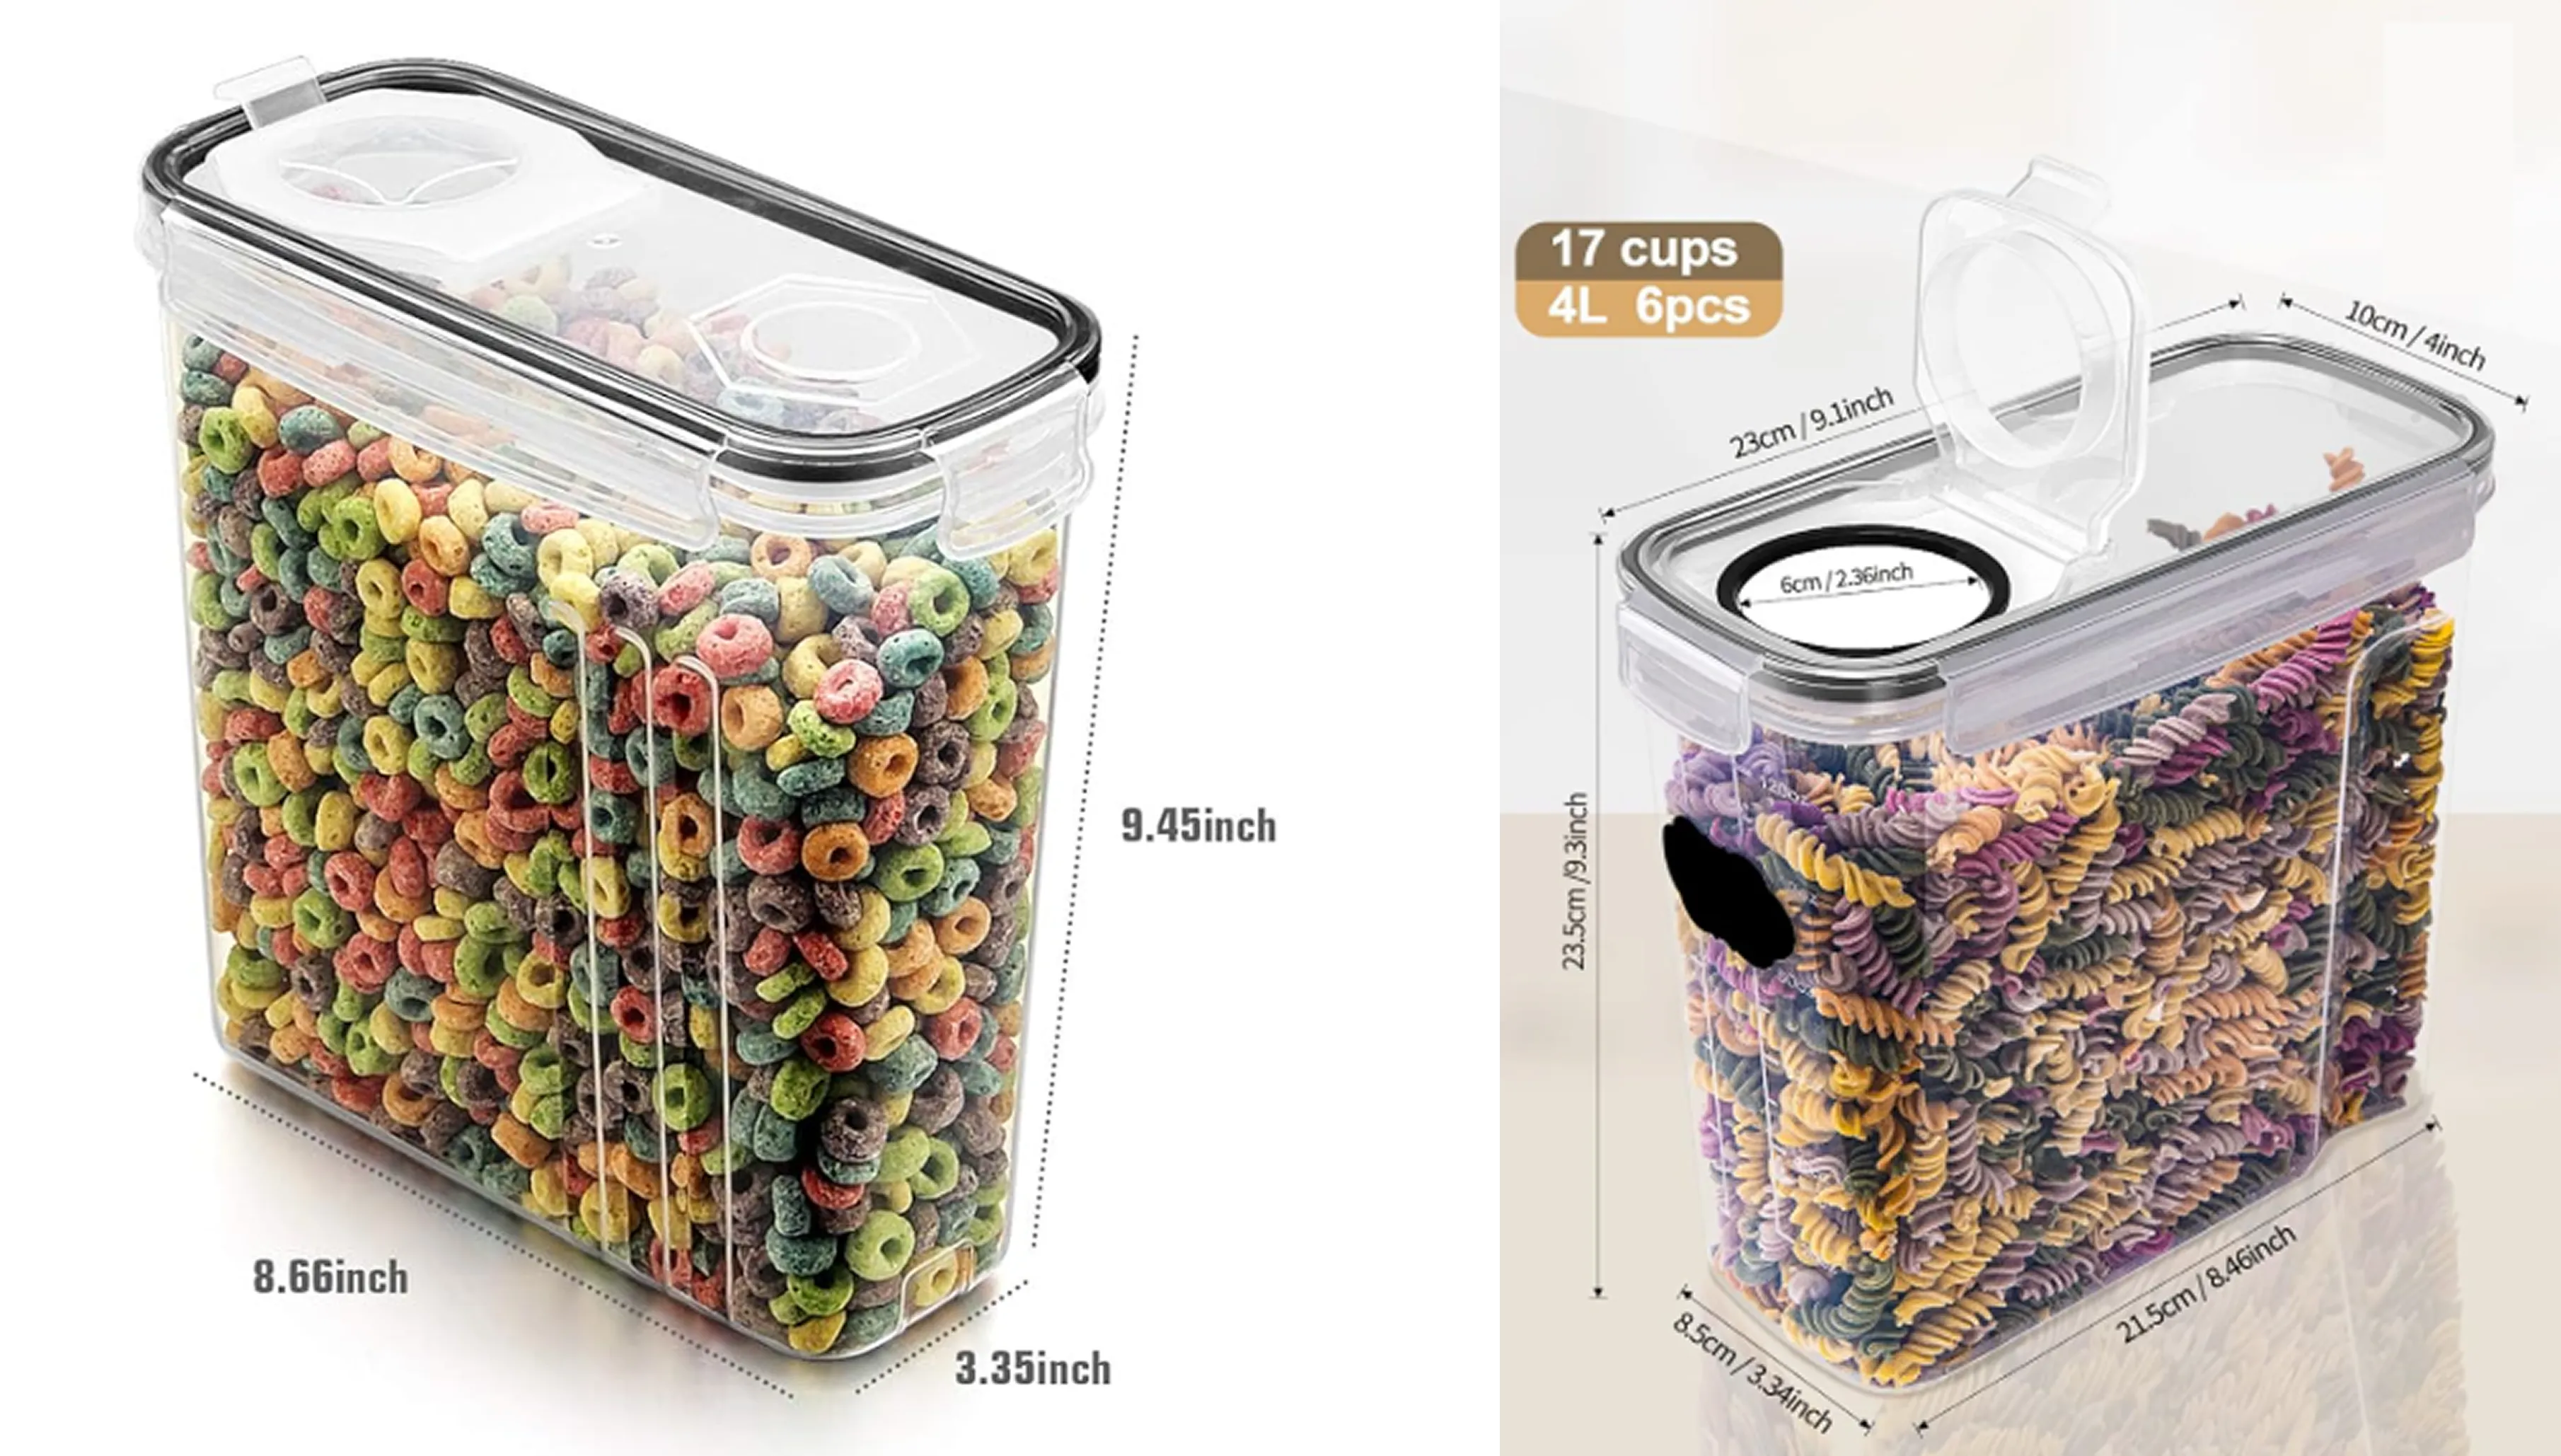
The DryBase has been tested and verified with two cereal containers: the Wildone (recognizable by its three smaller grooves, left image) and the GoMaihe (recognizable by its wider narrow section, right image). Both can be found on Amazon. All performance specifications for the DryBase, including maximum temperature and drying times, are based on testing with these two containers.
Other containers may also be compatible, provided they meet the following requirements:
- The container has a capacity of ~4 litres
- The container opening (lid) is exactly 6cm in diameter
- The small lid cap can be fully removed, so the container can sit flat on the DryBase
Note that we cannot guarantee that untested containers will reach the same temperatures or drying performance as verified with the two containers above.
Printing while drying
If you plan to use your DryBase while actively 3D-printing with the spool inside the container, we recommend using the Wildone container only. The GoMaihe's narrower section may not provide enough clearance for a spool during printing. Always verify this yourself before use.
Step 1: Preparing the drybox
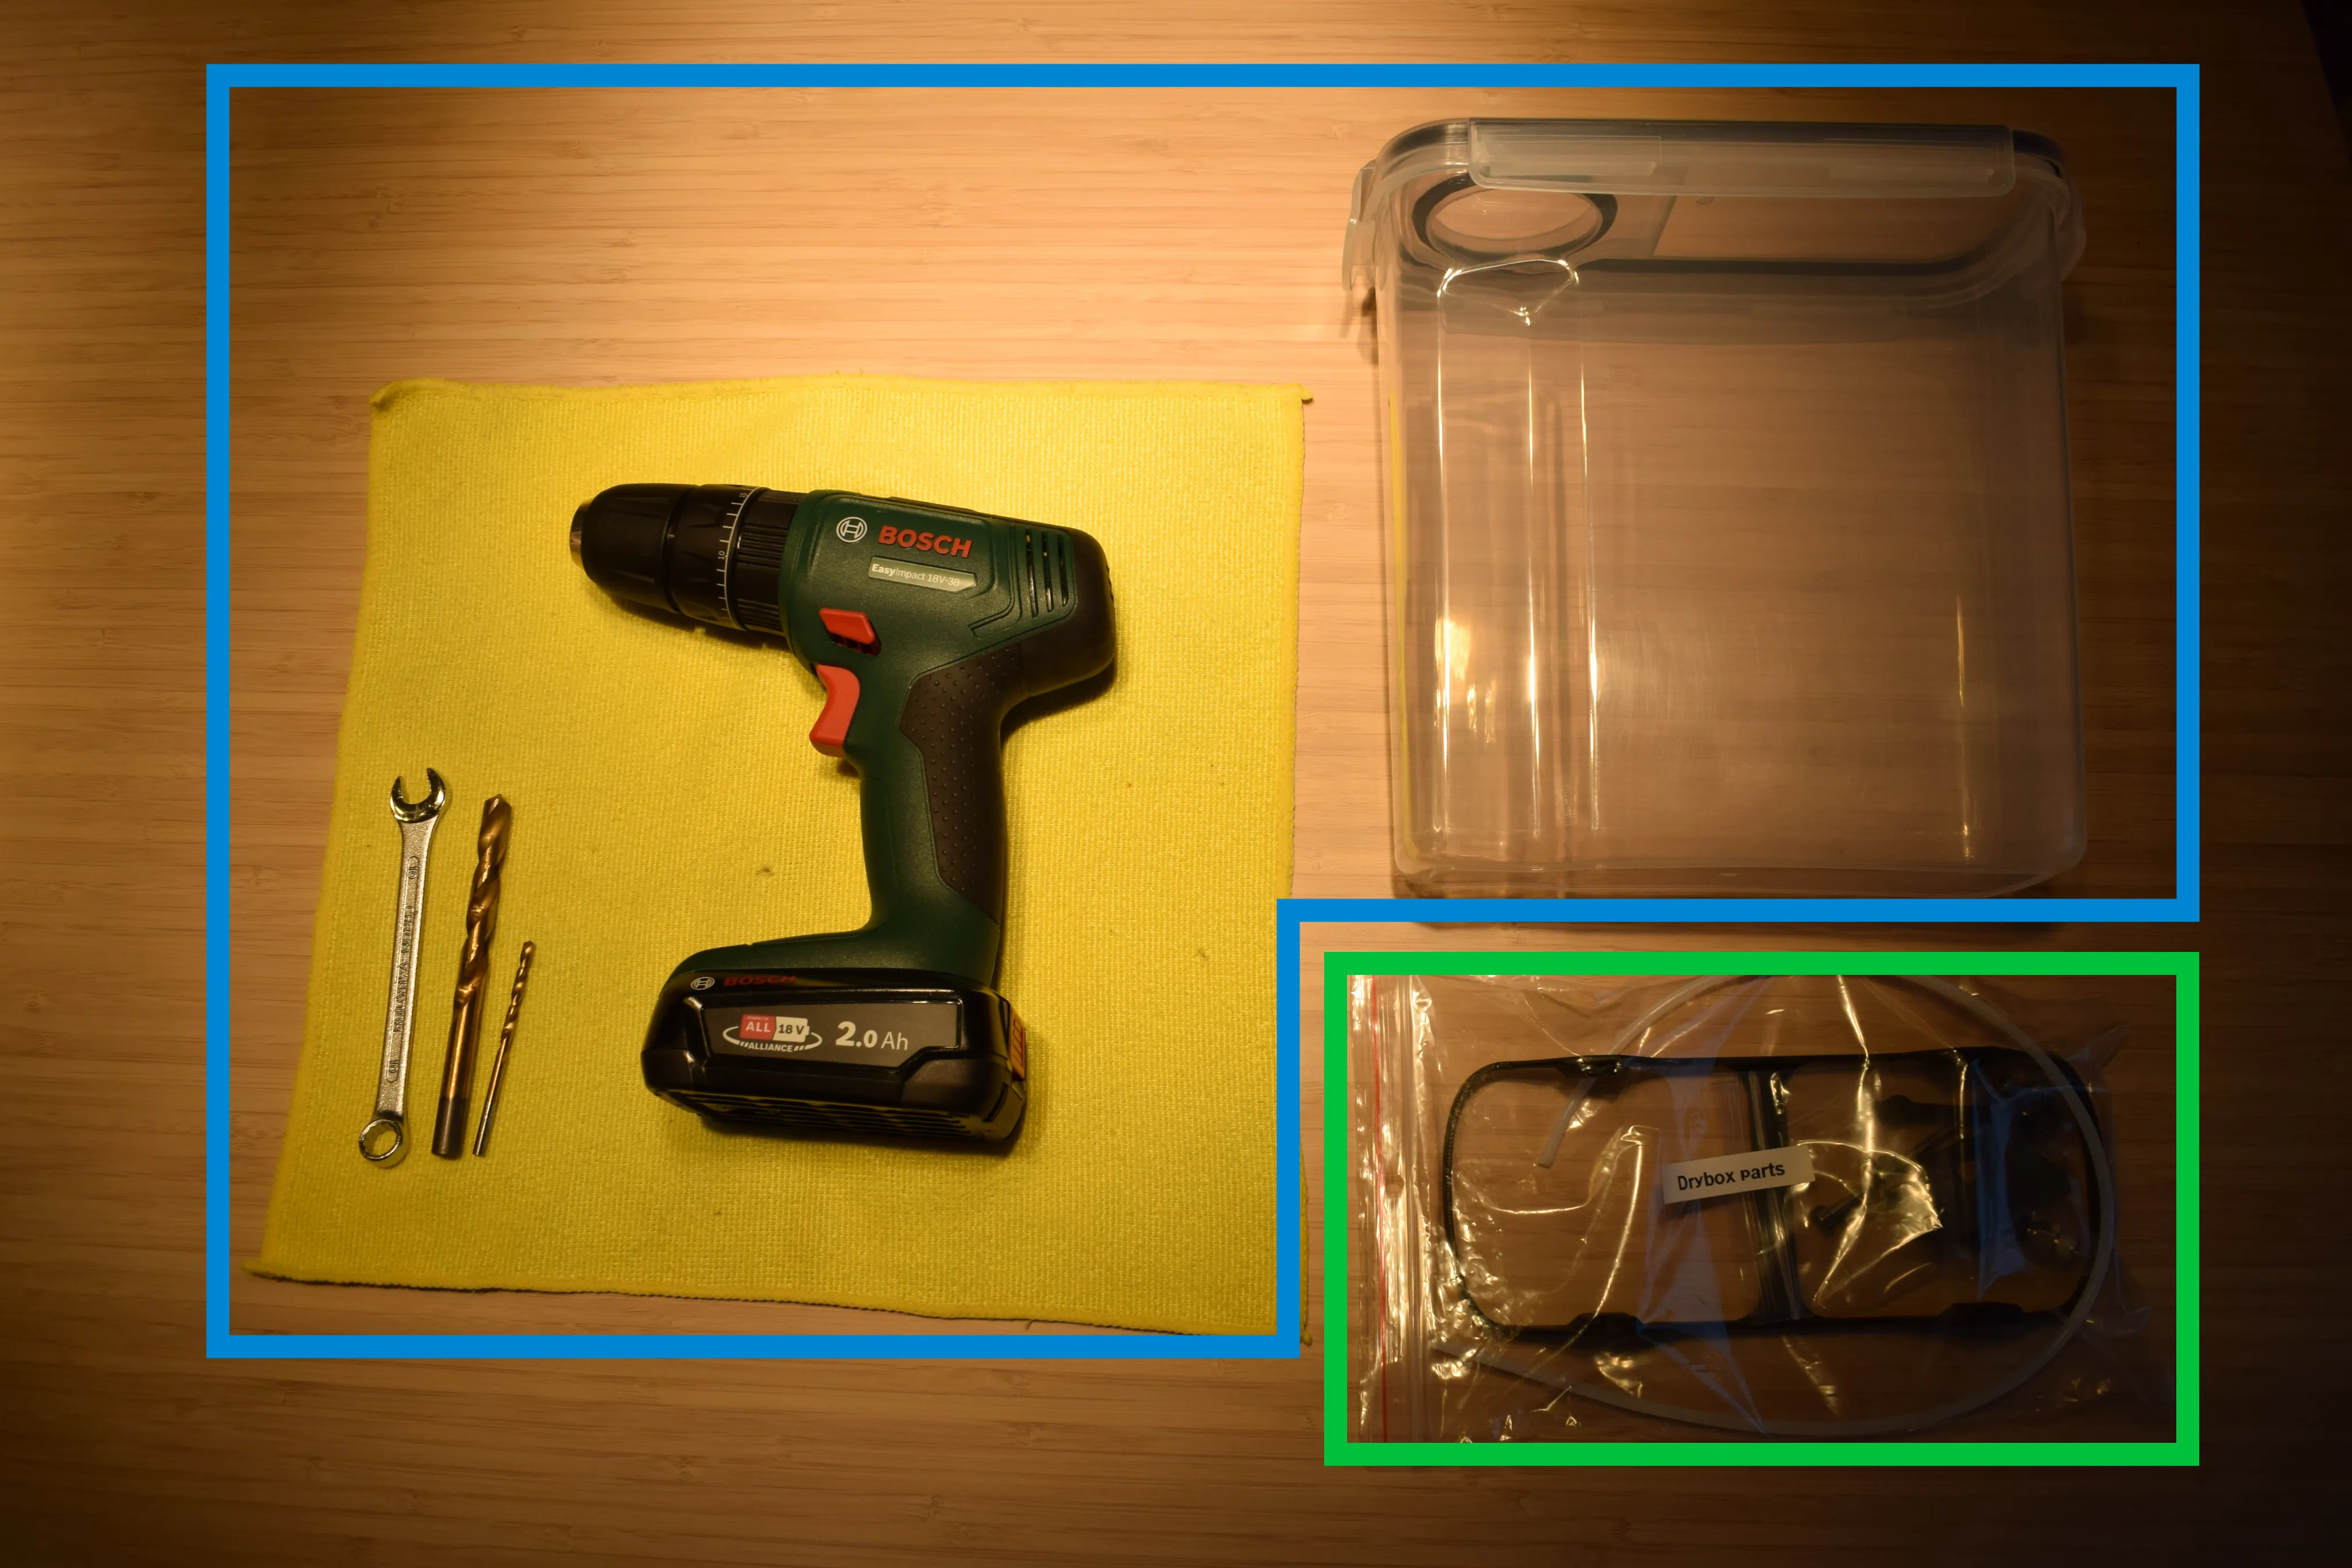
The image below is divided into two sections. The blue box shows what you need to provide yourself. The green box shows the parts included in your DryBase kit.
You will need to provide yourself (blue box):
- 1x 4L cereal container
- 1x M10 wrench
- 1x 4mm drill bit (to drill through soft plastic)
- 1x 9mm drill bit (to drill through soft plastic)
- 1x drilling machine
- Cloth
What's included in your kit (green box):
- Drybox parts (from the Drybox parts bag)
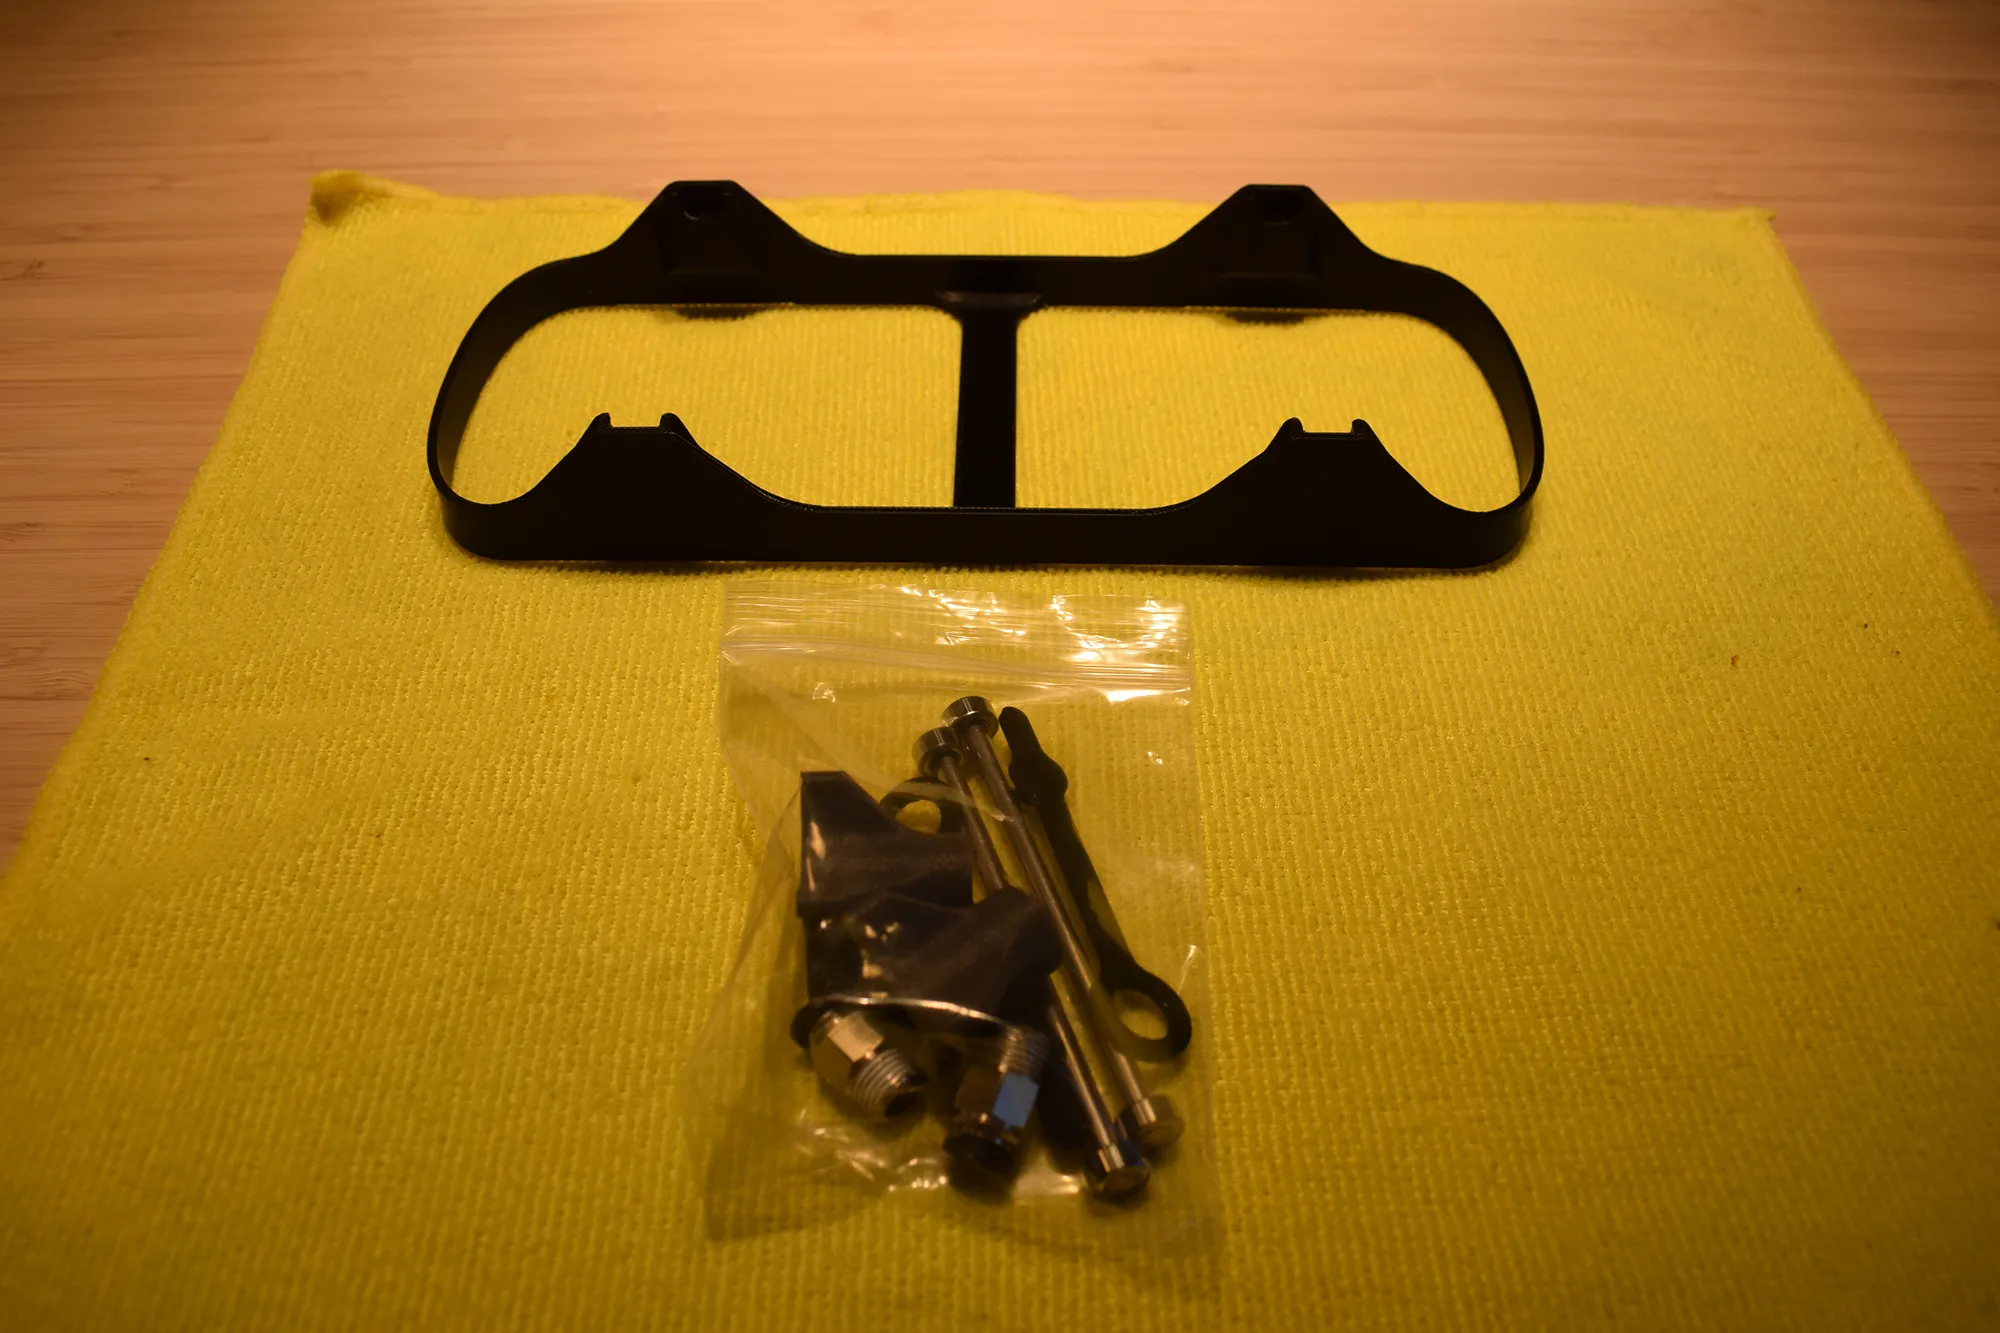
a. Open the Drybox parts bag and locate the 3D-printed spool holder and the small parts bag, as shown in the image below.
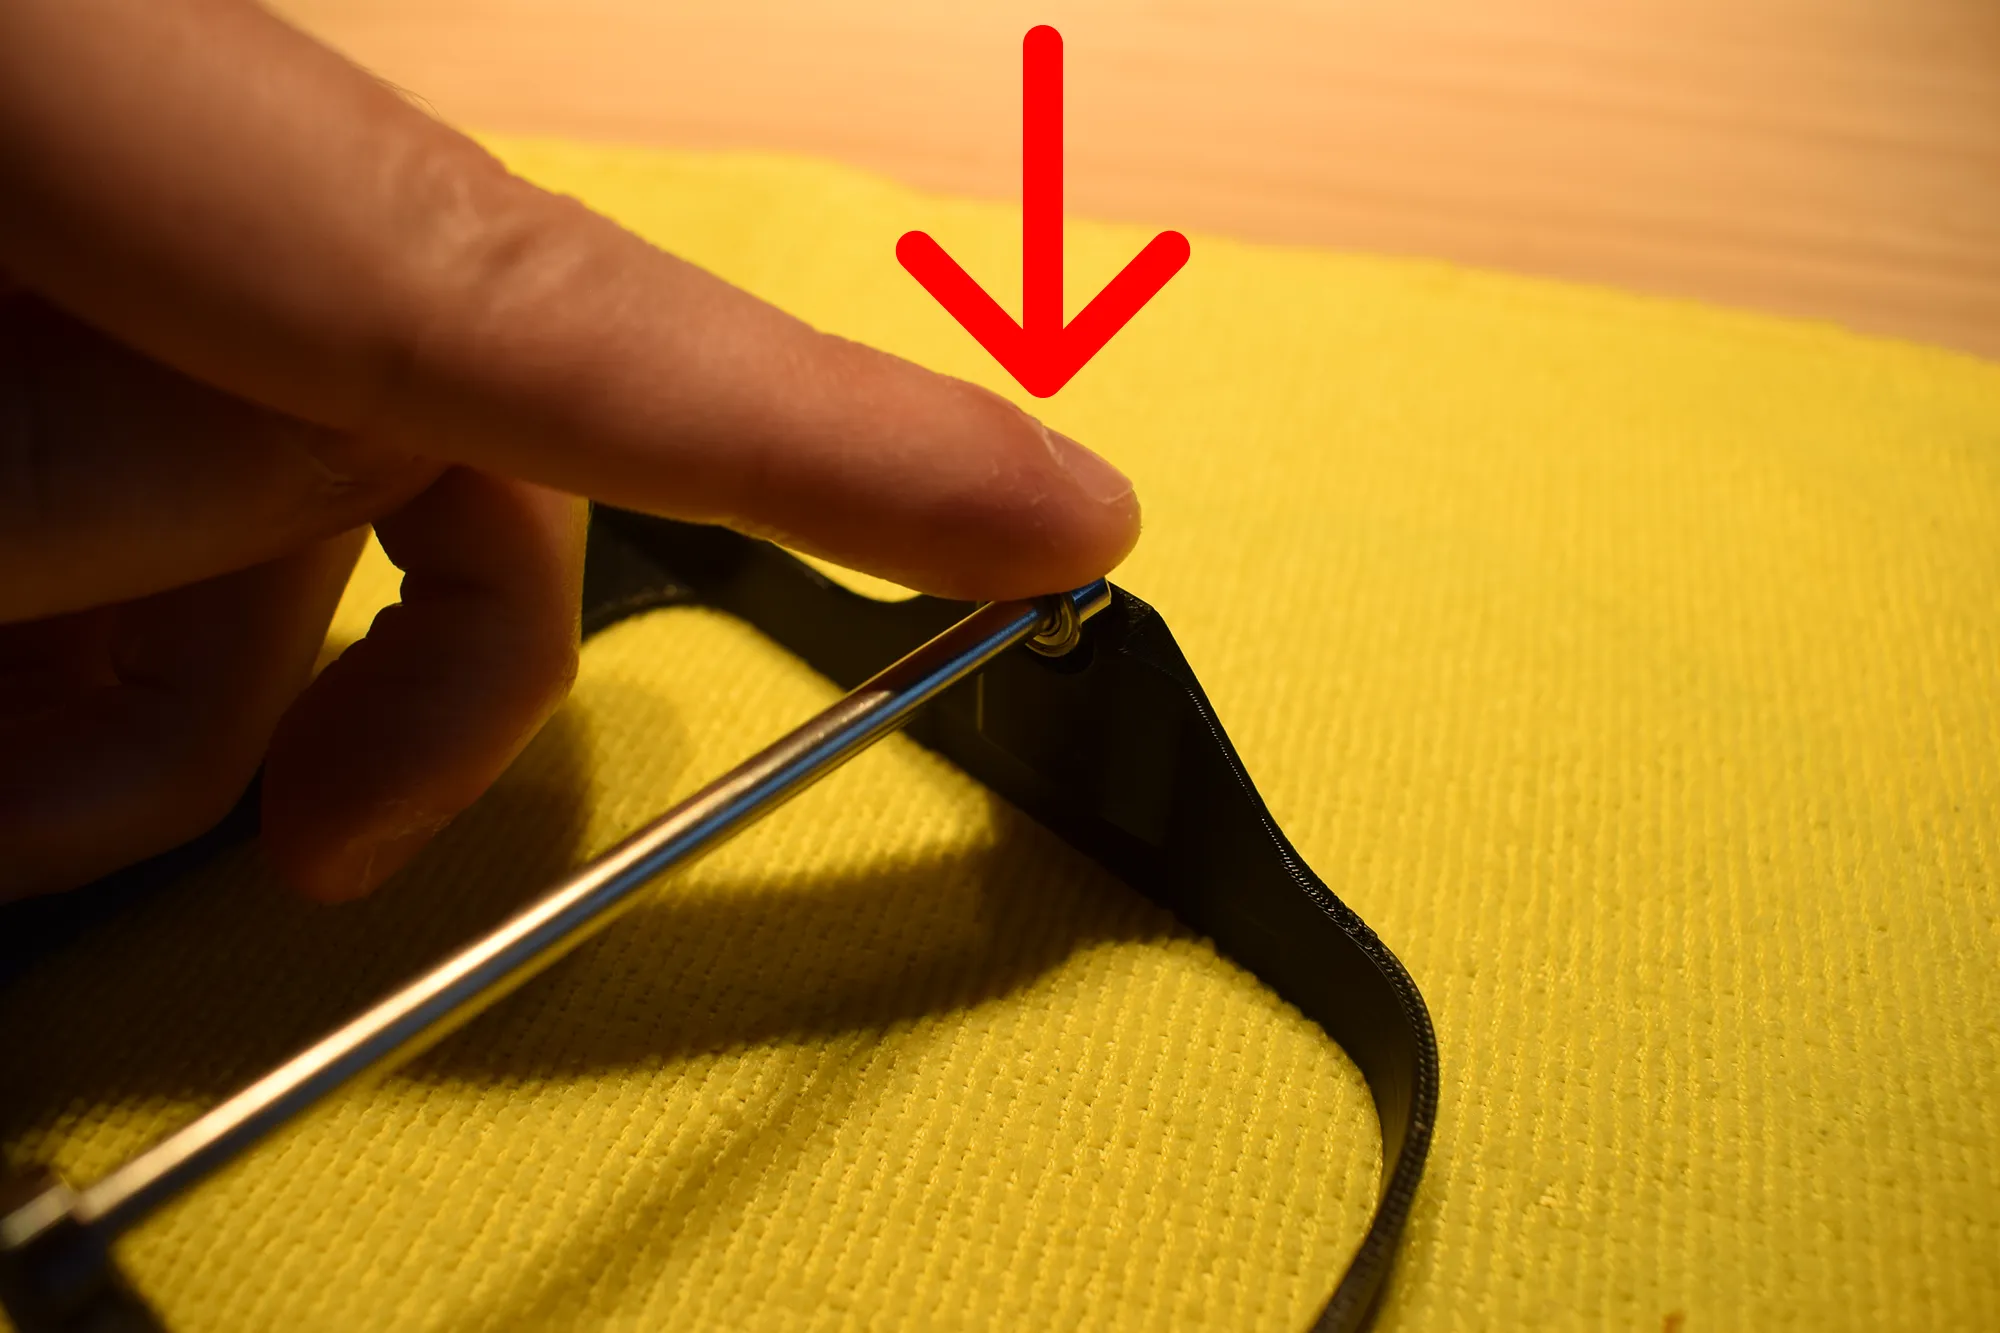
b. Take the shafts and bearings from the small parts bag and insert them into the dedicated sockets on the spool holder as shown in the image below. Press down in the direction indicated by the red arrow until you hear and feel a click. This confirms the shaft is fully seated in the socket.
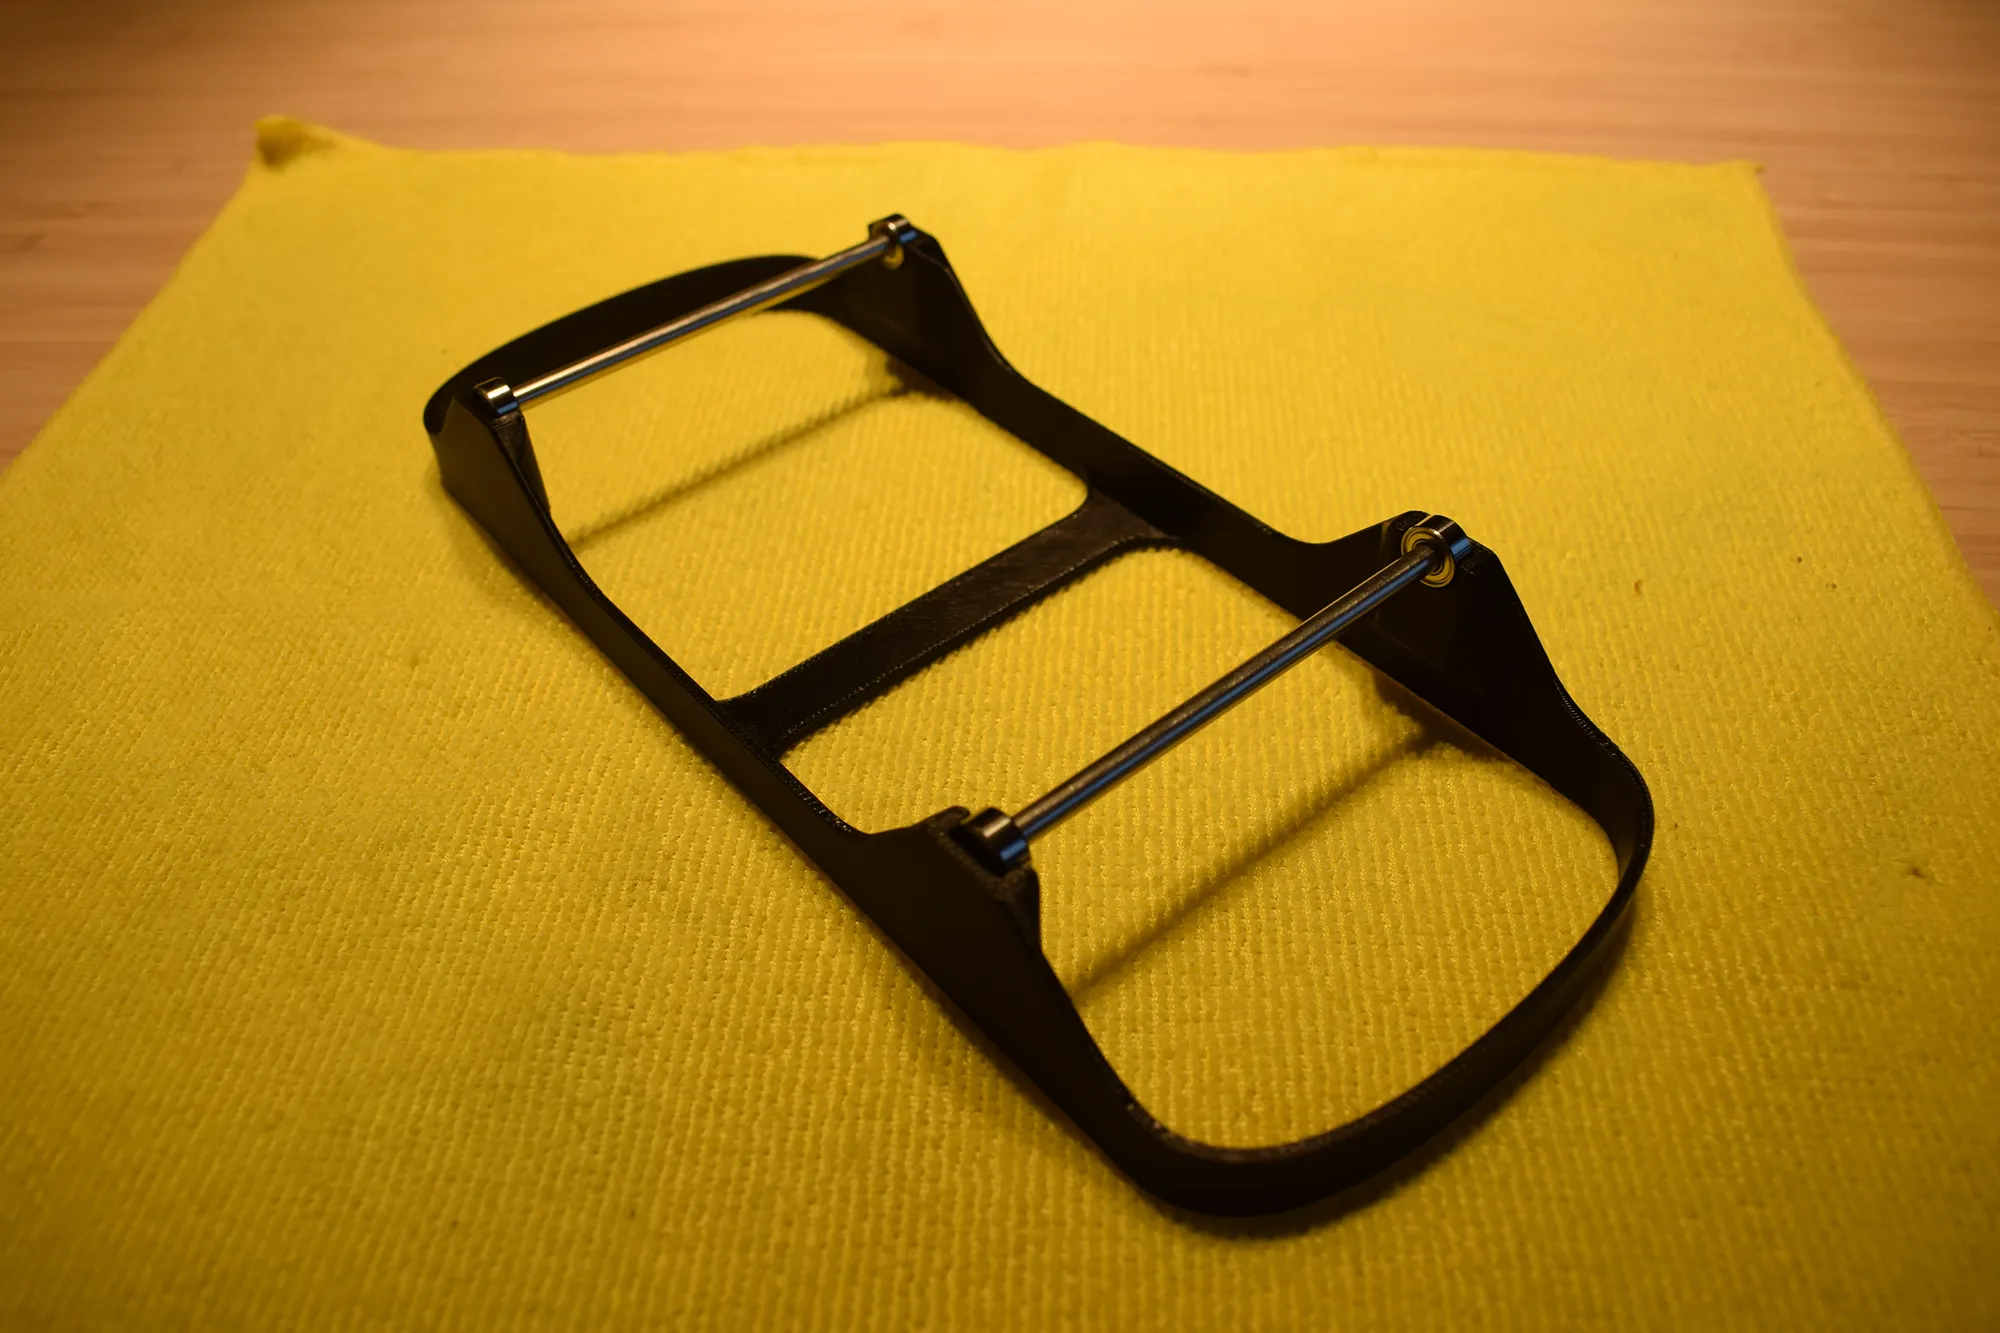
After installing both shafts, the result should match the image below.
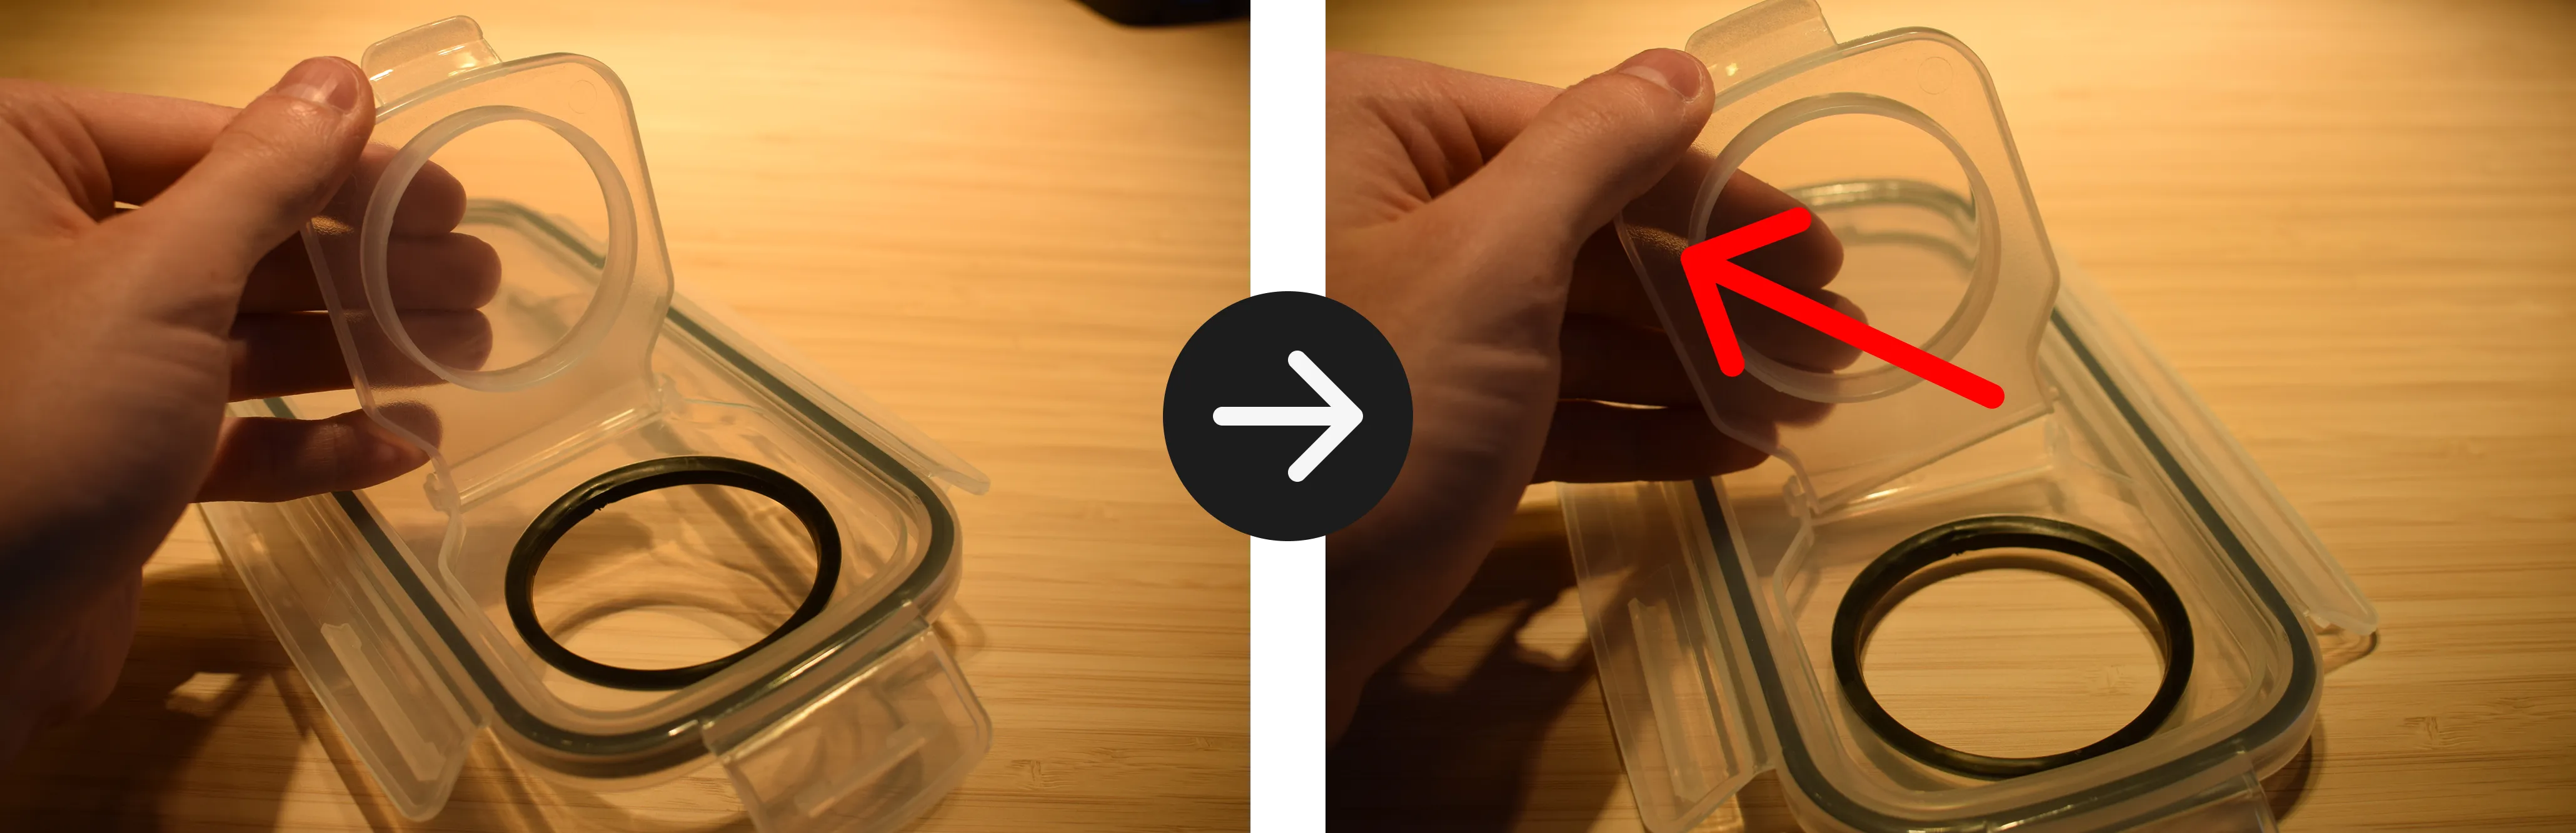
c. Take the cereal container and remove the lid. Then remove the small circular cap from the centre of the lid by sliding it outward in the direction indicated by the arrow in the image below. The cap should come off without much effort.
Do not use a sharp tool to remove the cap
Apply pressure with your fingers only to avoid damaging the lid.
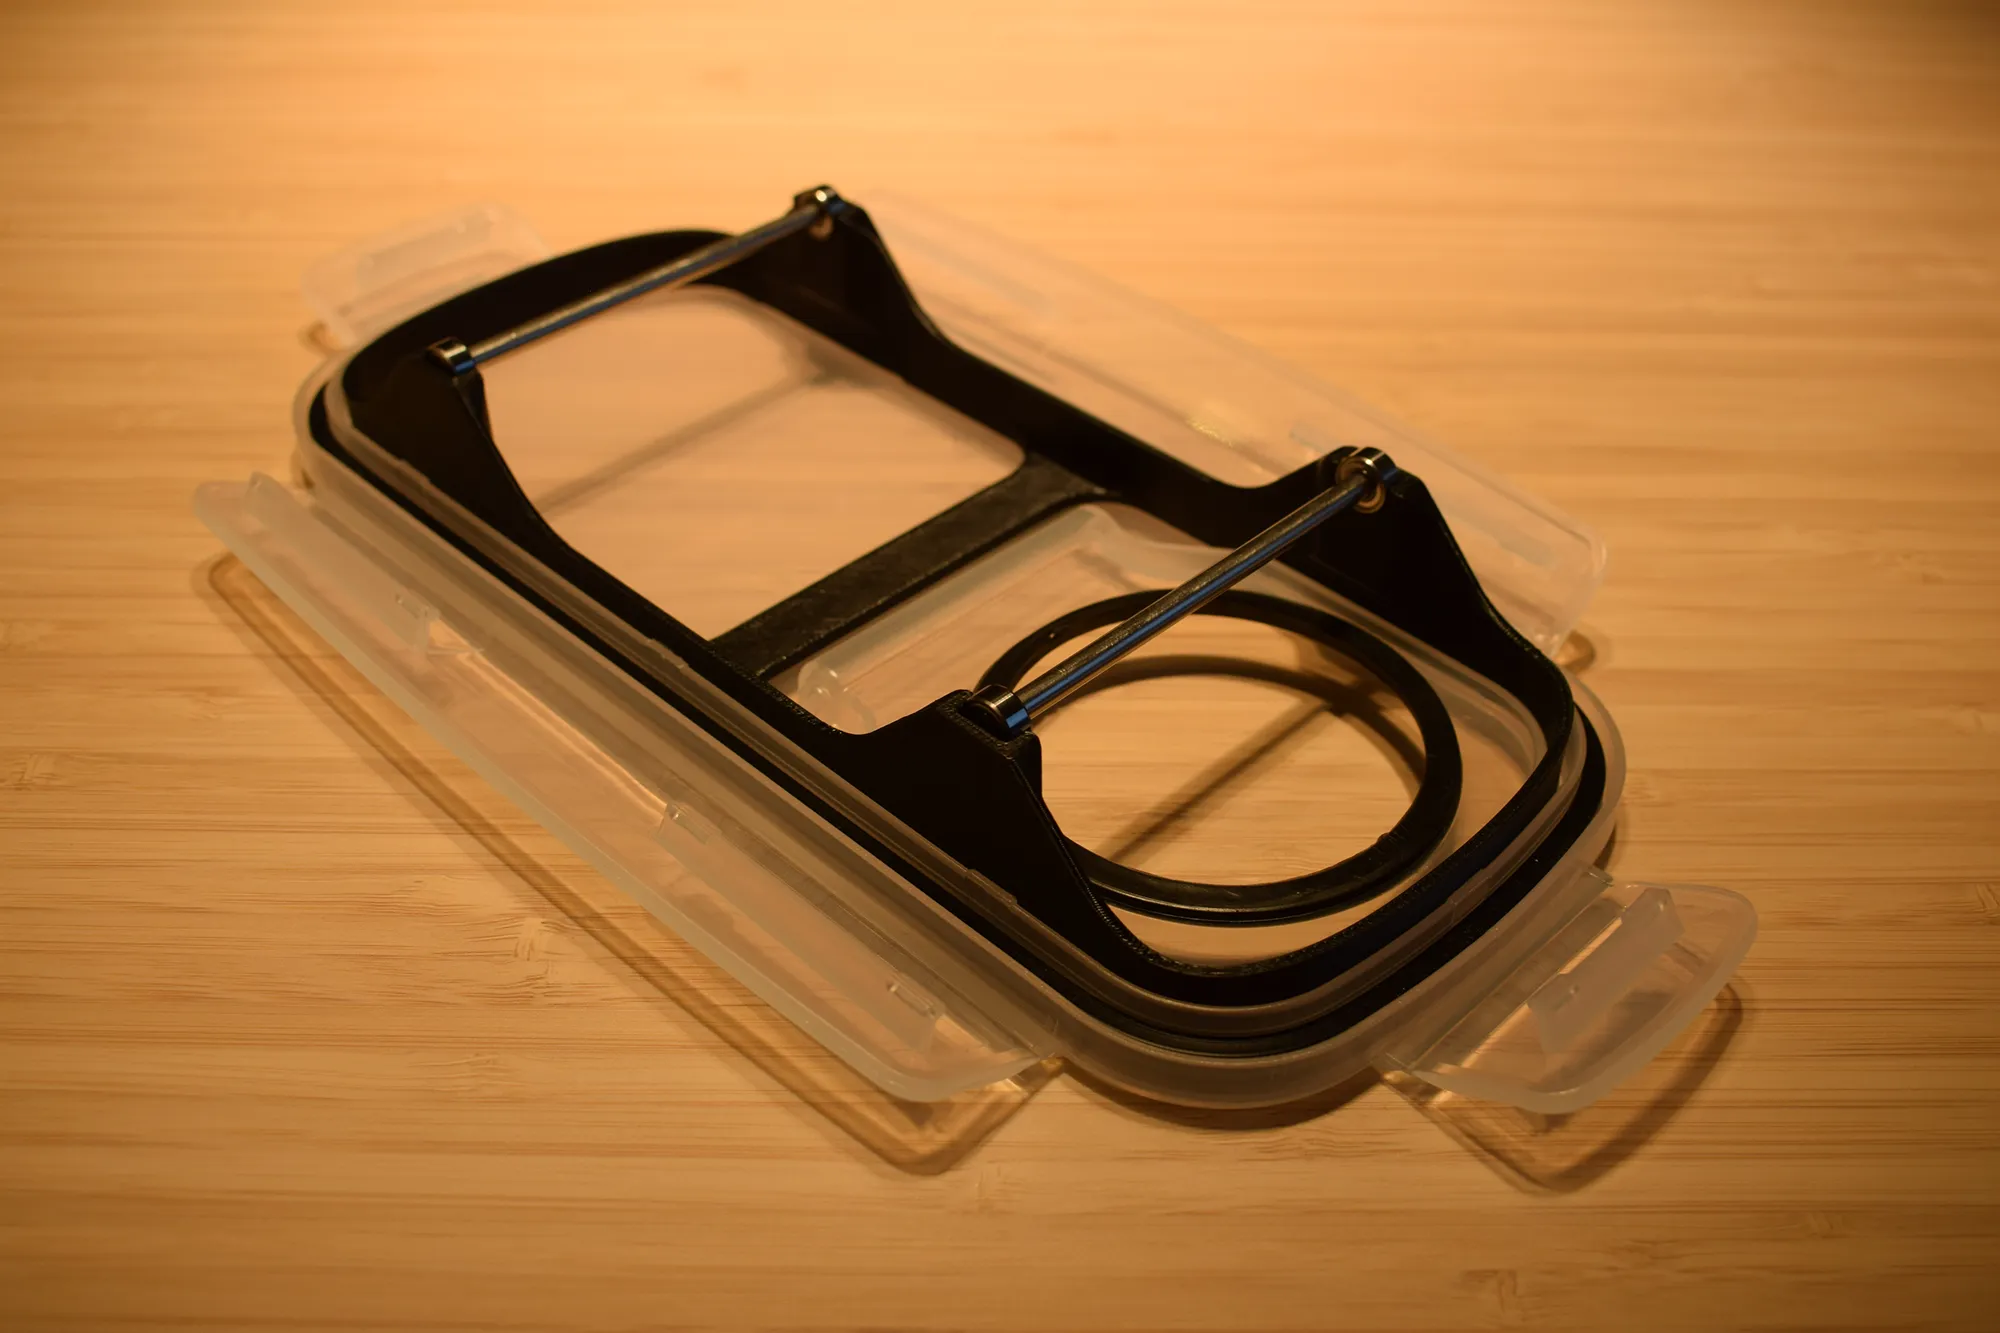
d. Insert the spool holder with shafts into the opening of the cereal container lid, as shown in the image below. Set this assembly aside for now.
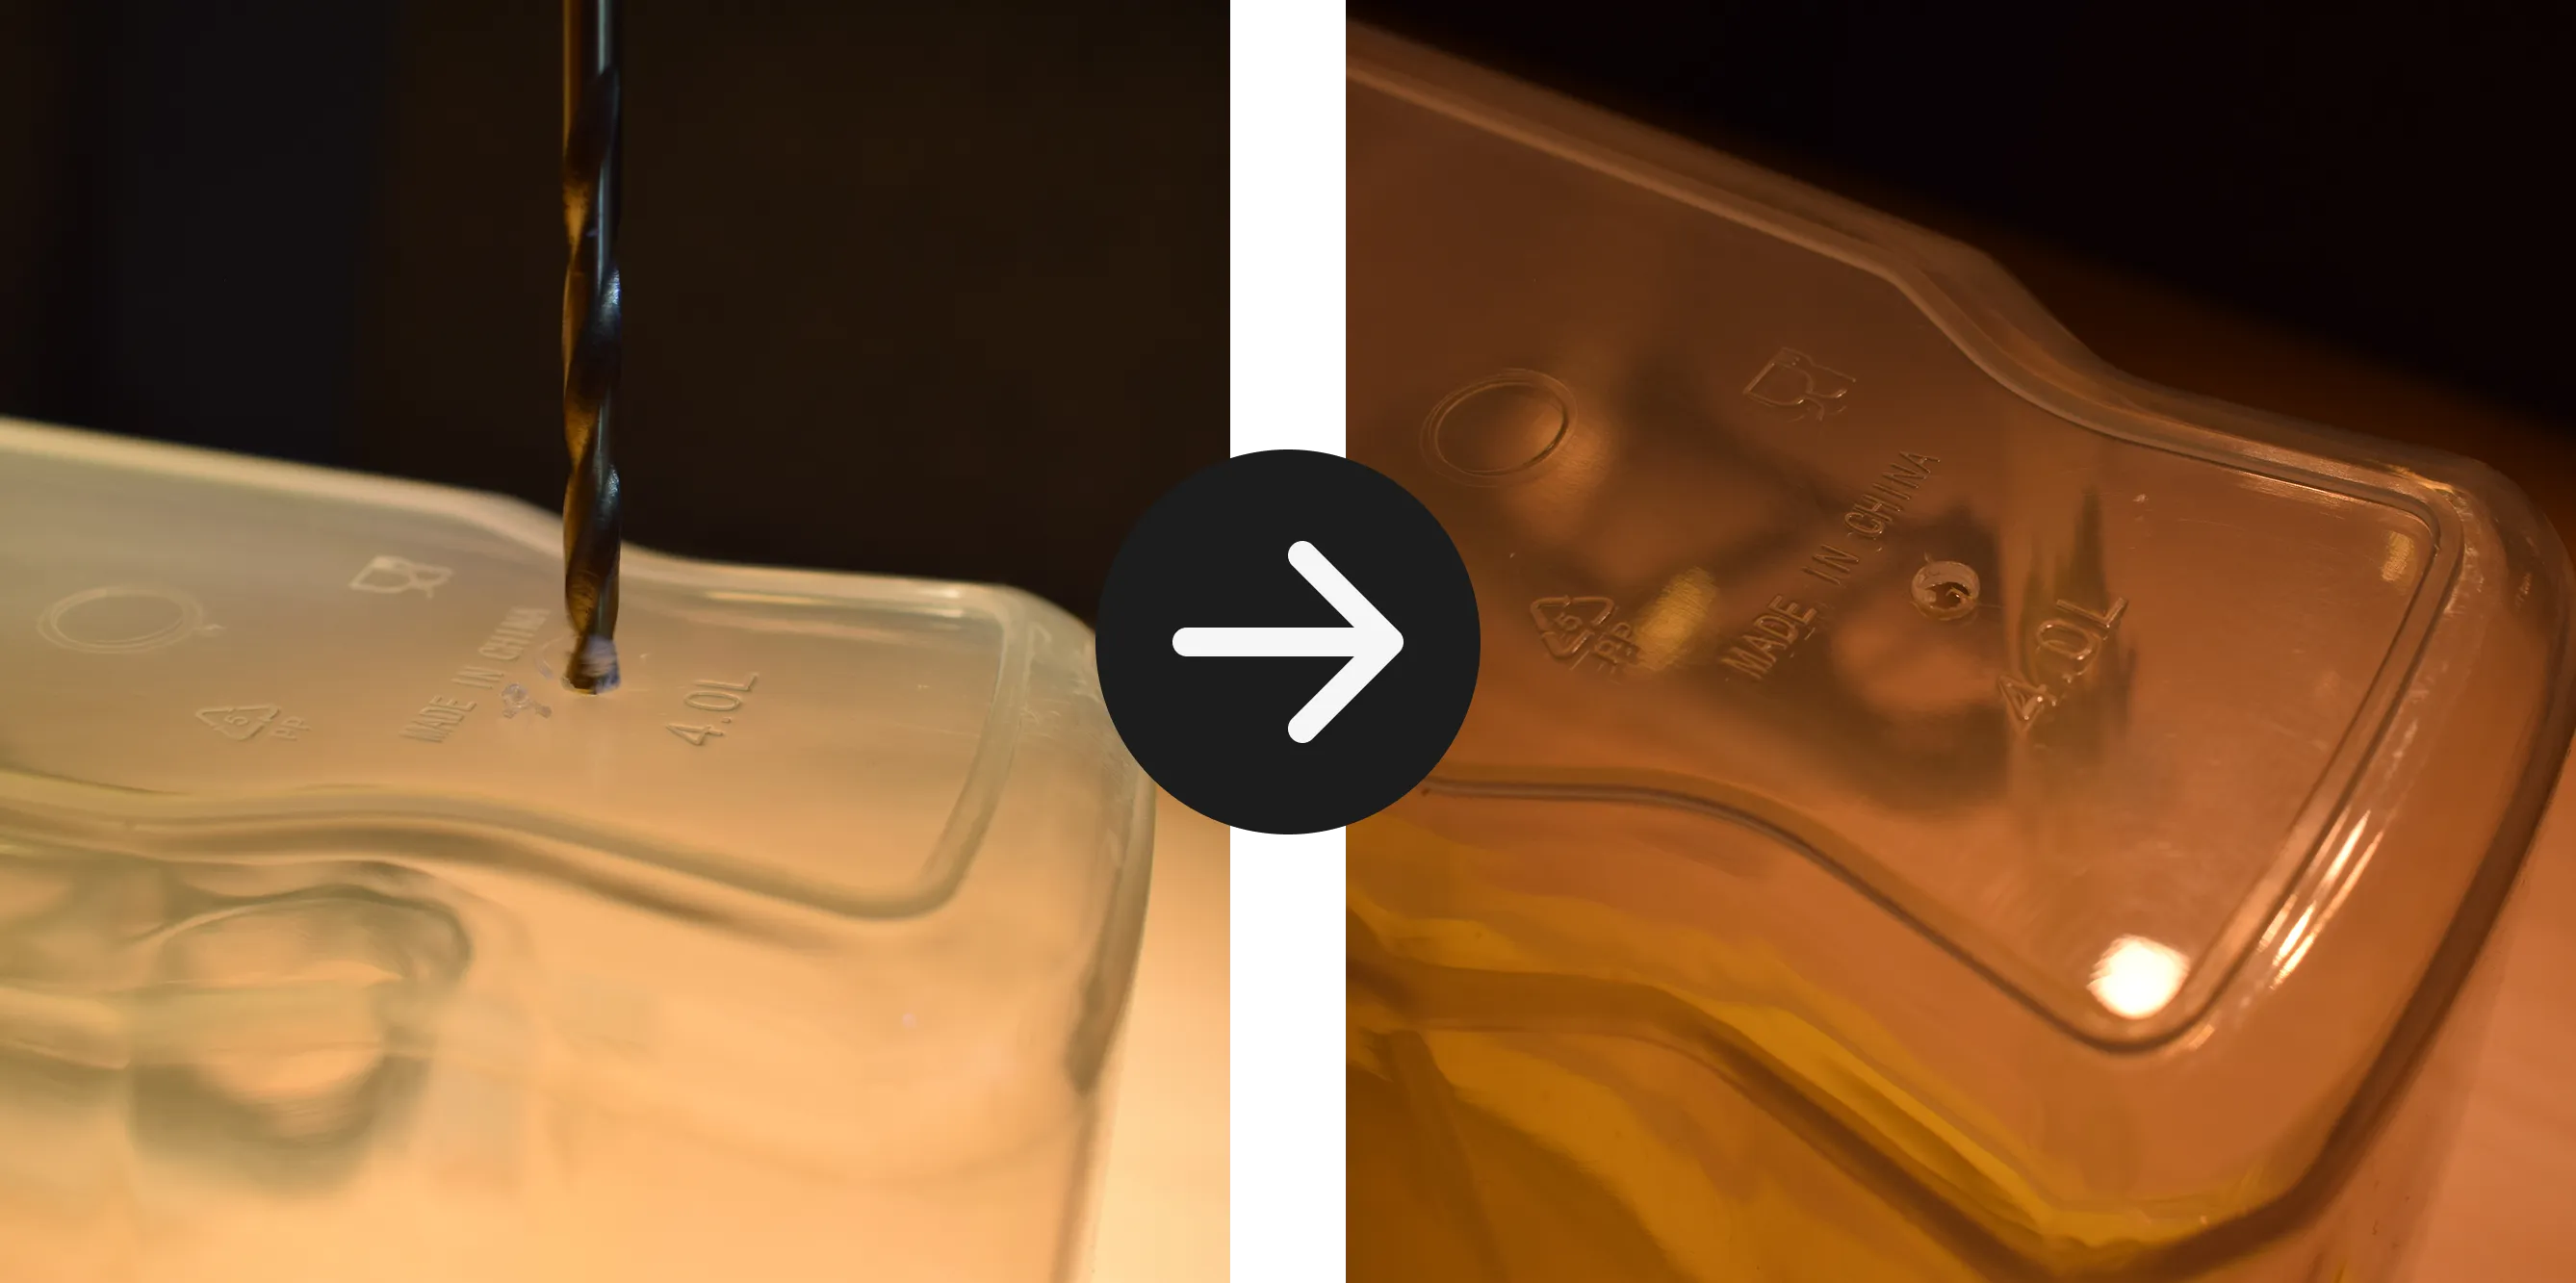
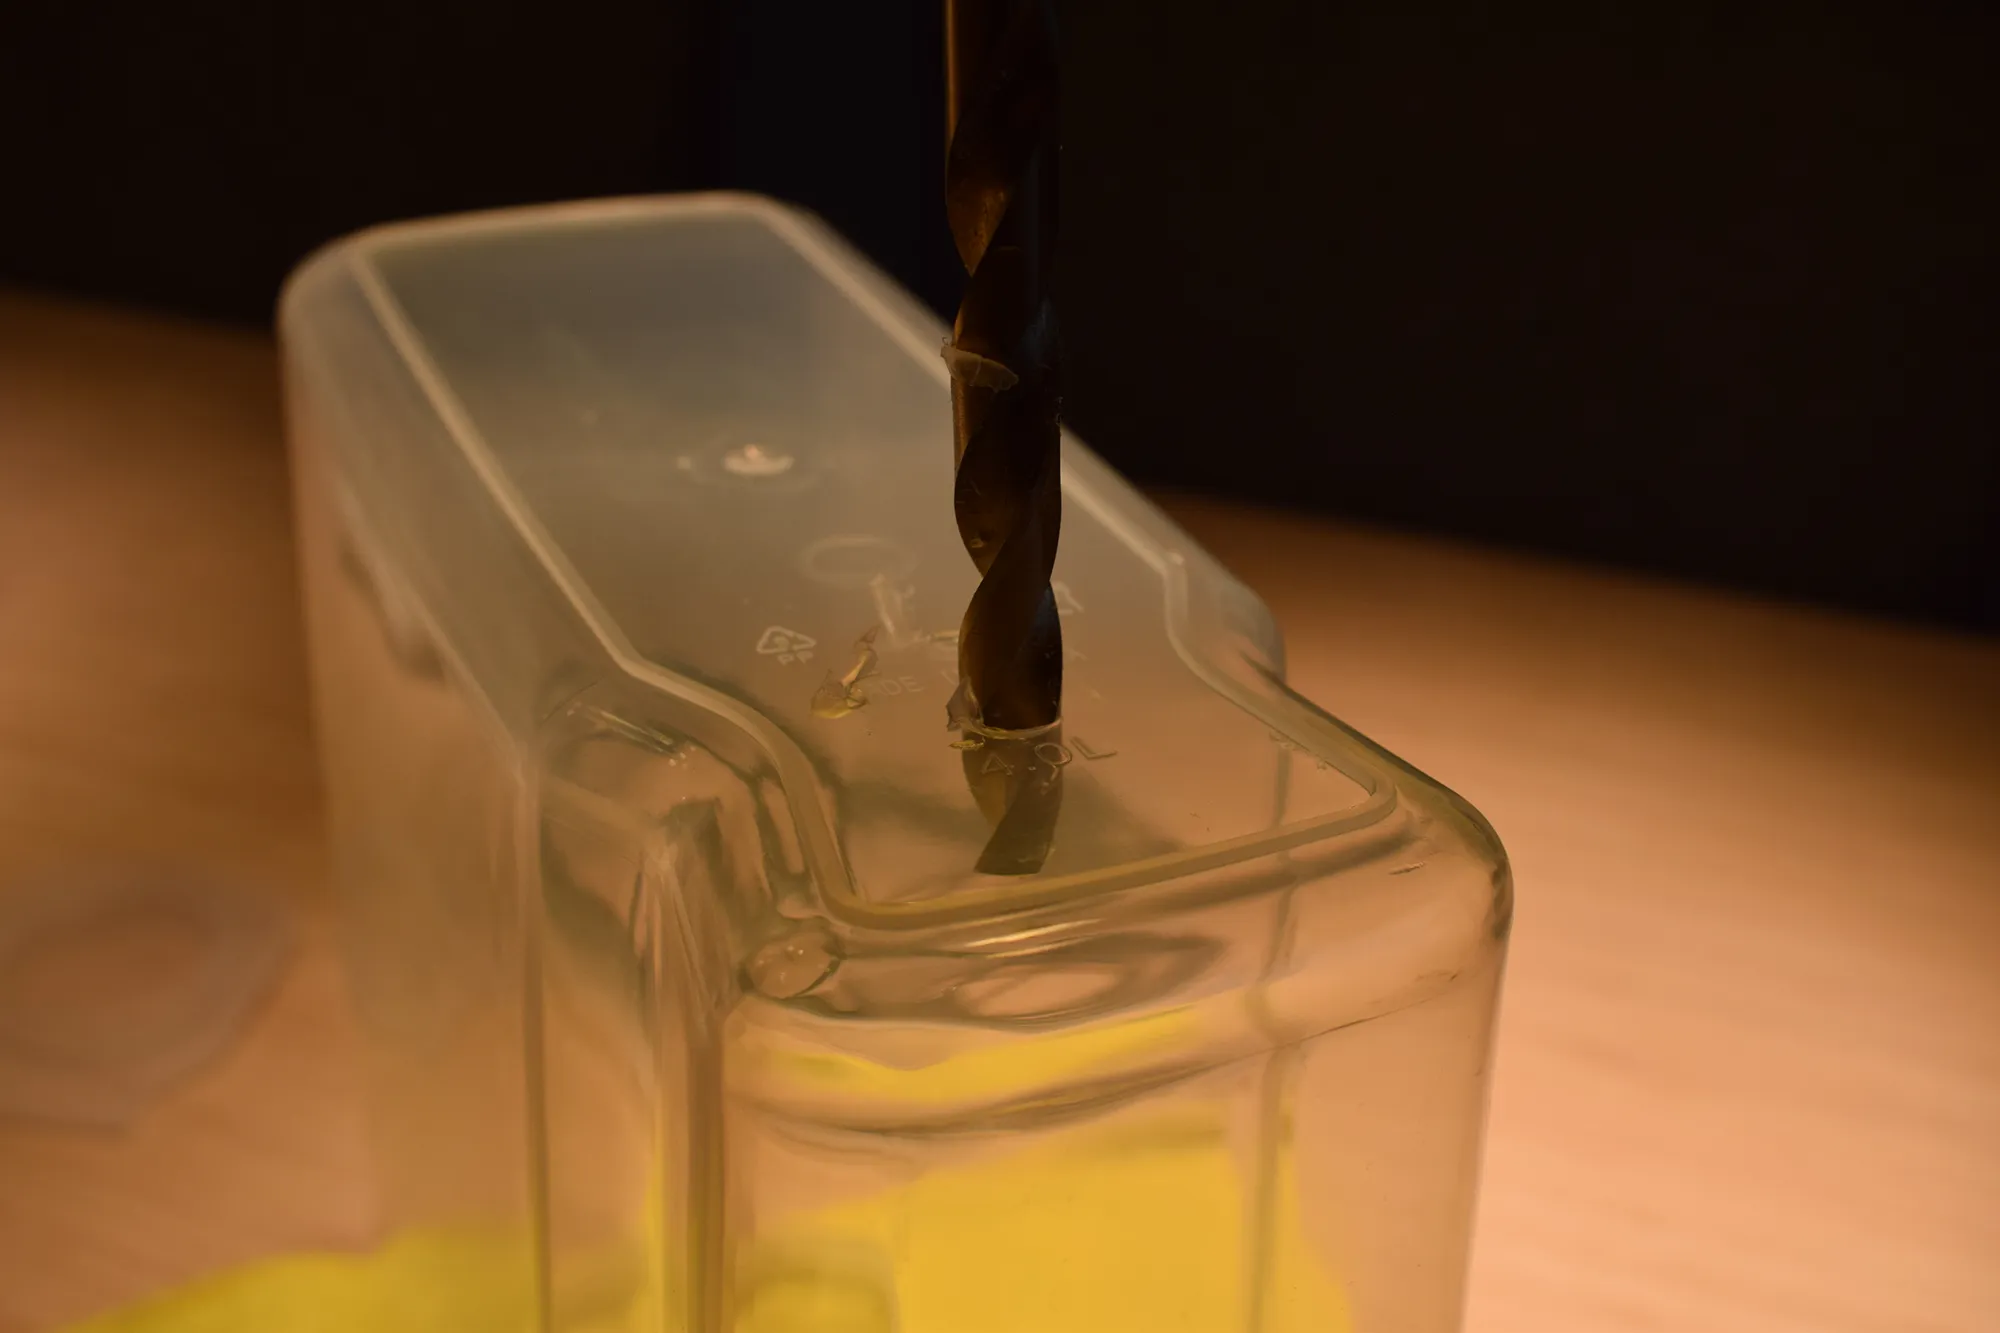
e. Drill a 4mm pilot hole at each of your chosen locations on the side of the container, as shown in the images below. These holes will serve as the filament exit ports.
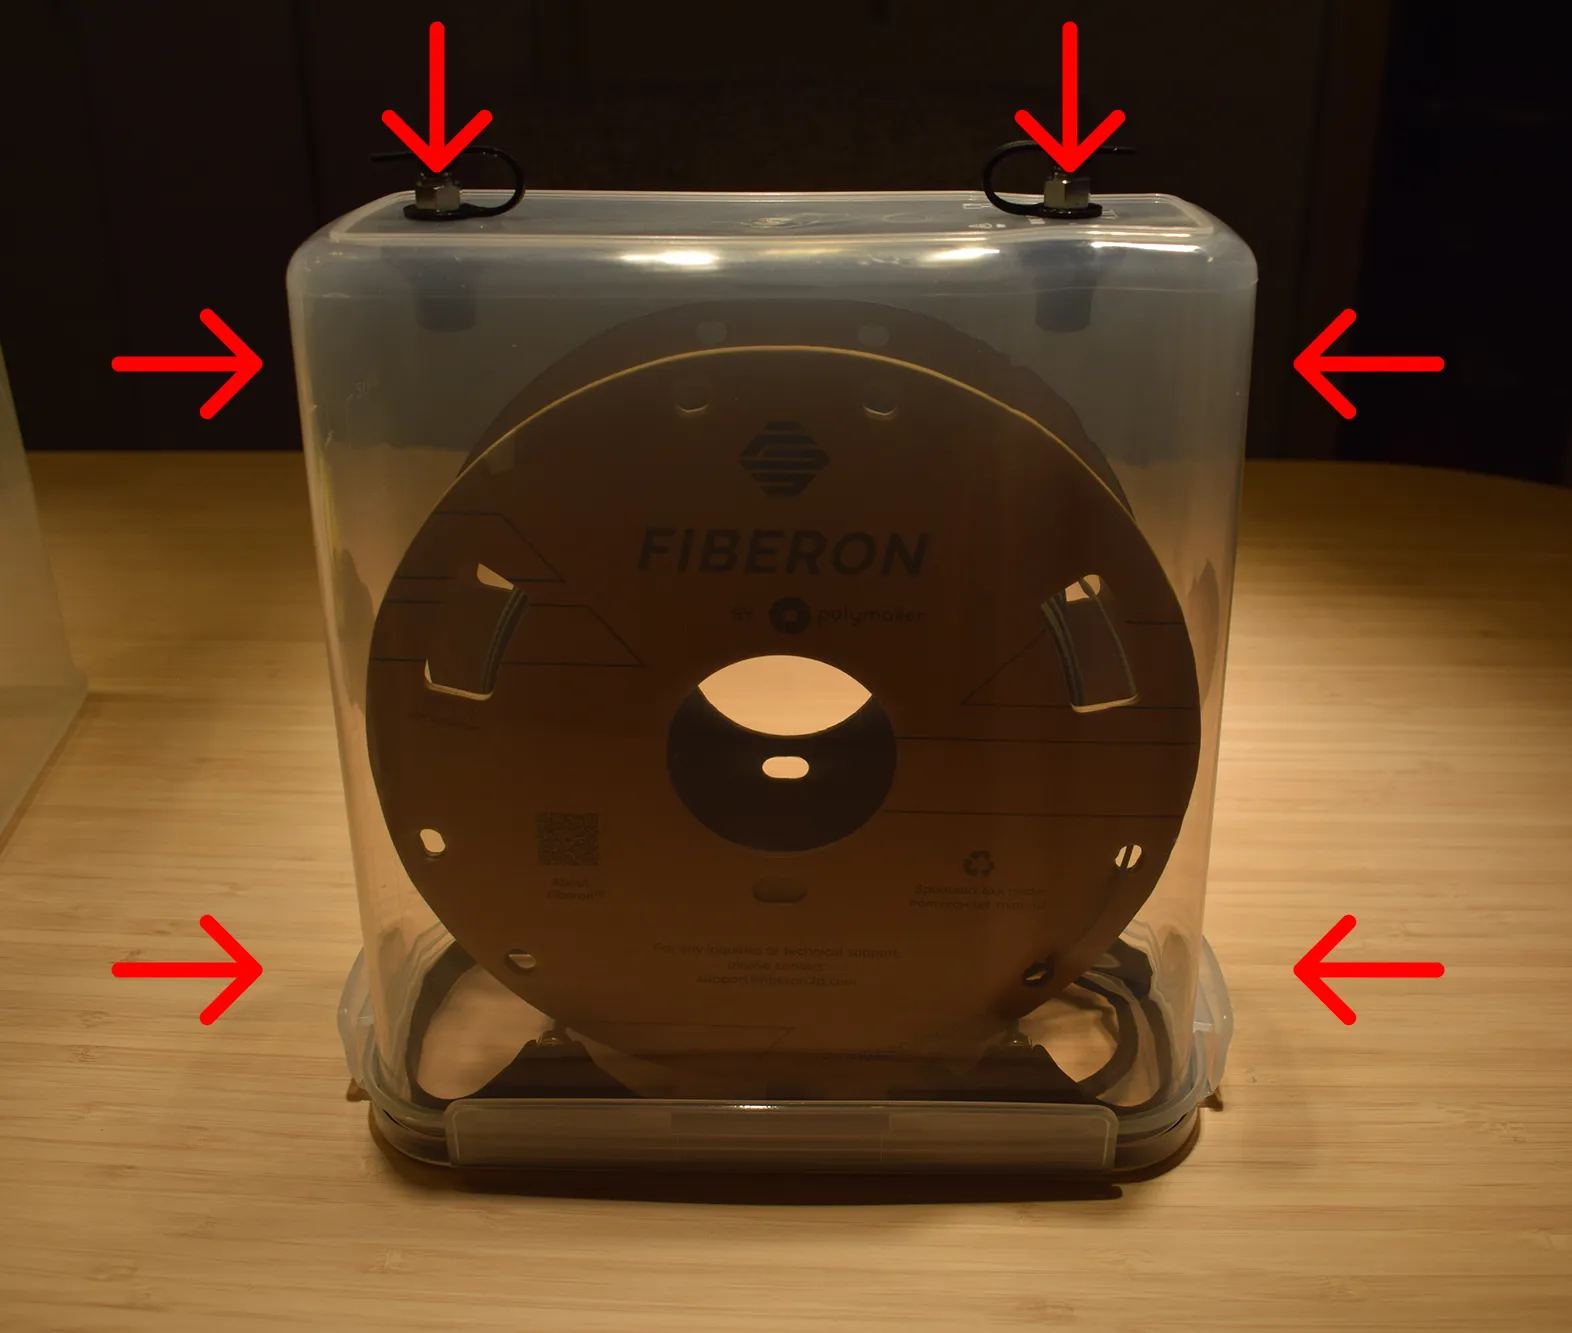
Hole placement
Position the hole tangent to the side of the spool to minimise pulling friction on the filament during printing. The six recommended locations are indicated in the image below with red arrows. Note that the kit includes enough parts for a maximum of 2 holes.
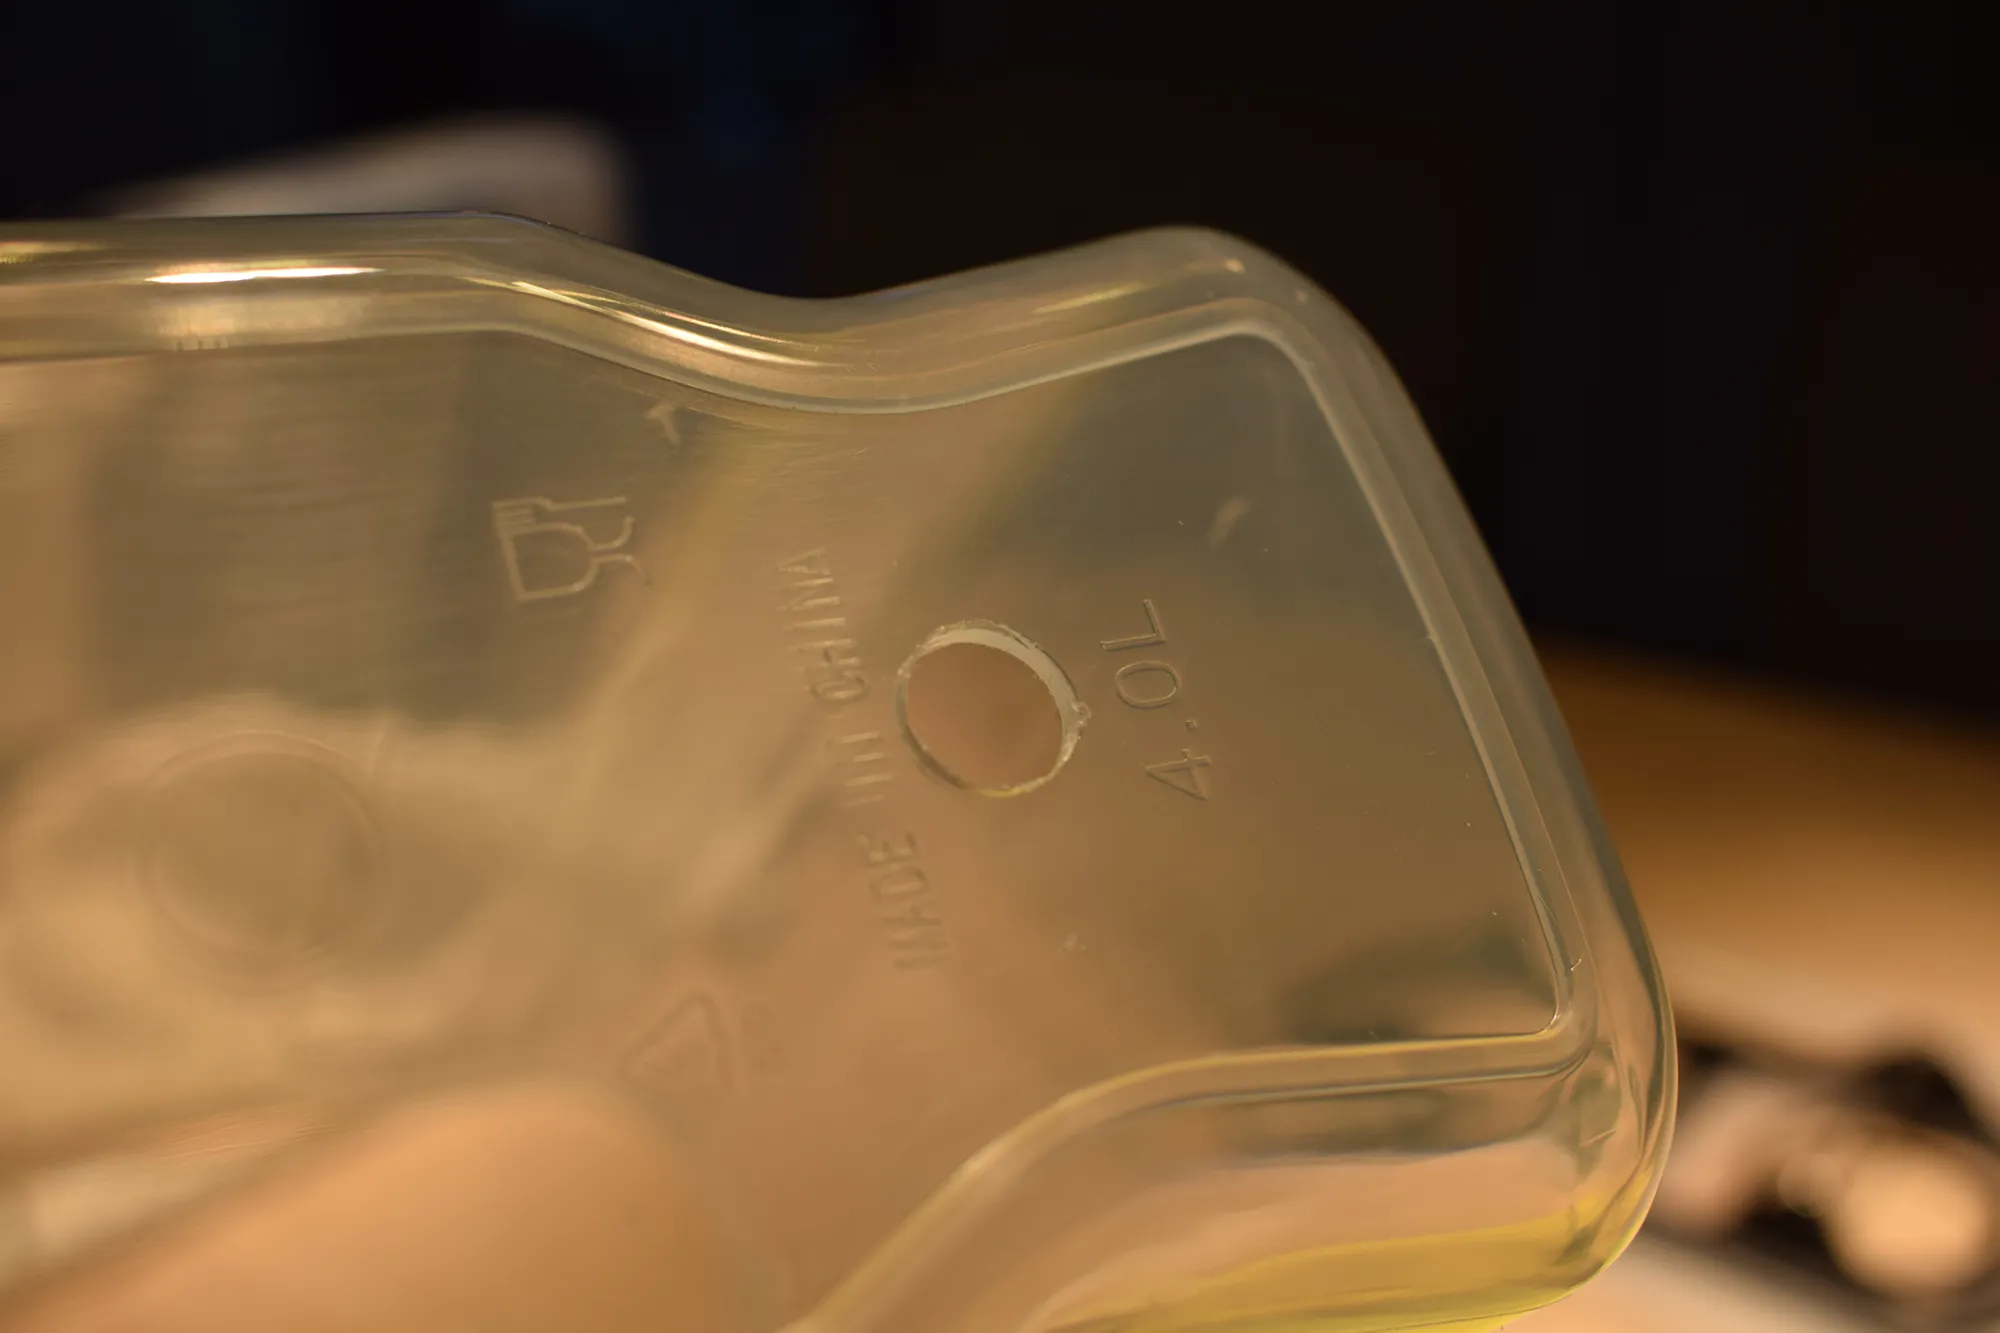
f. Switch to the 9mm drill bit and widen all 4mm pilot holes, as shown in the image below.
g. Remove any remaining burrs or plastic debris from the holes using a craft knife or your fingernail. The result should match the image below.
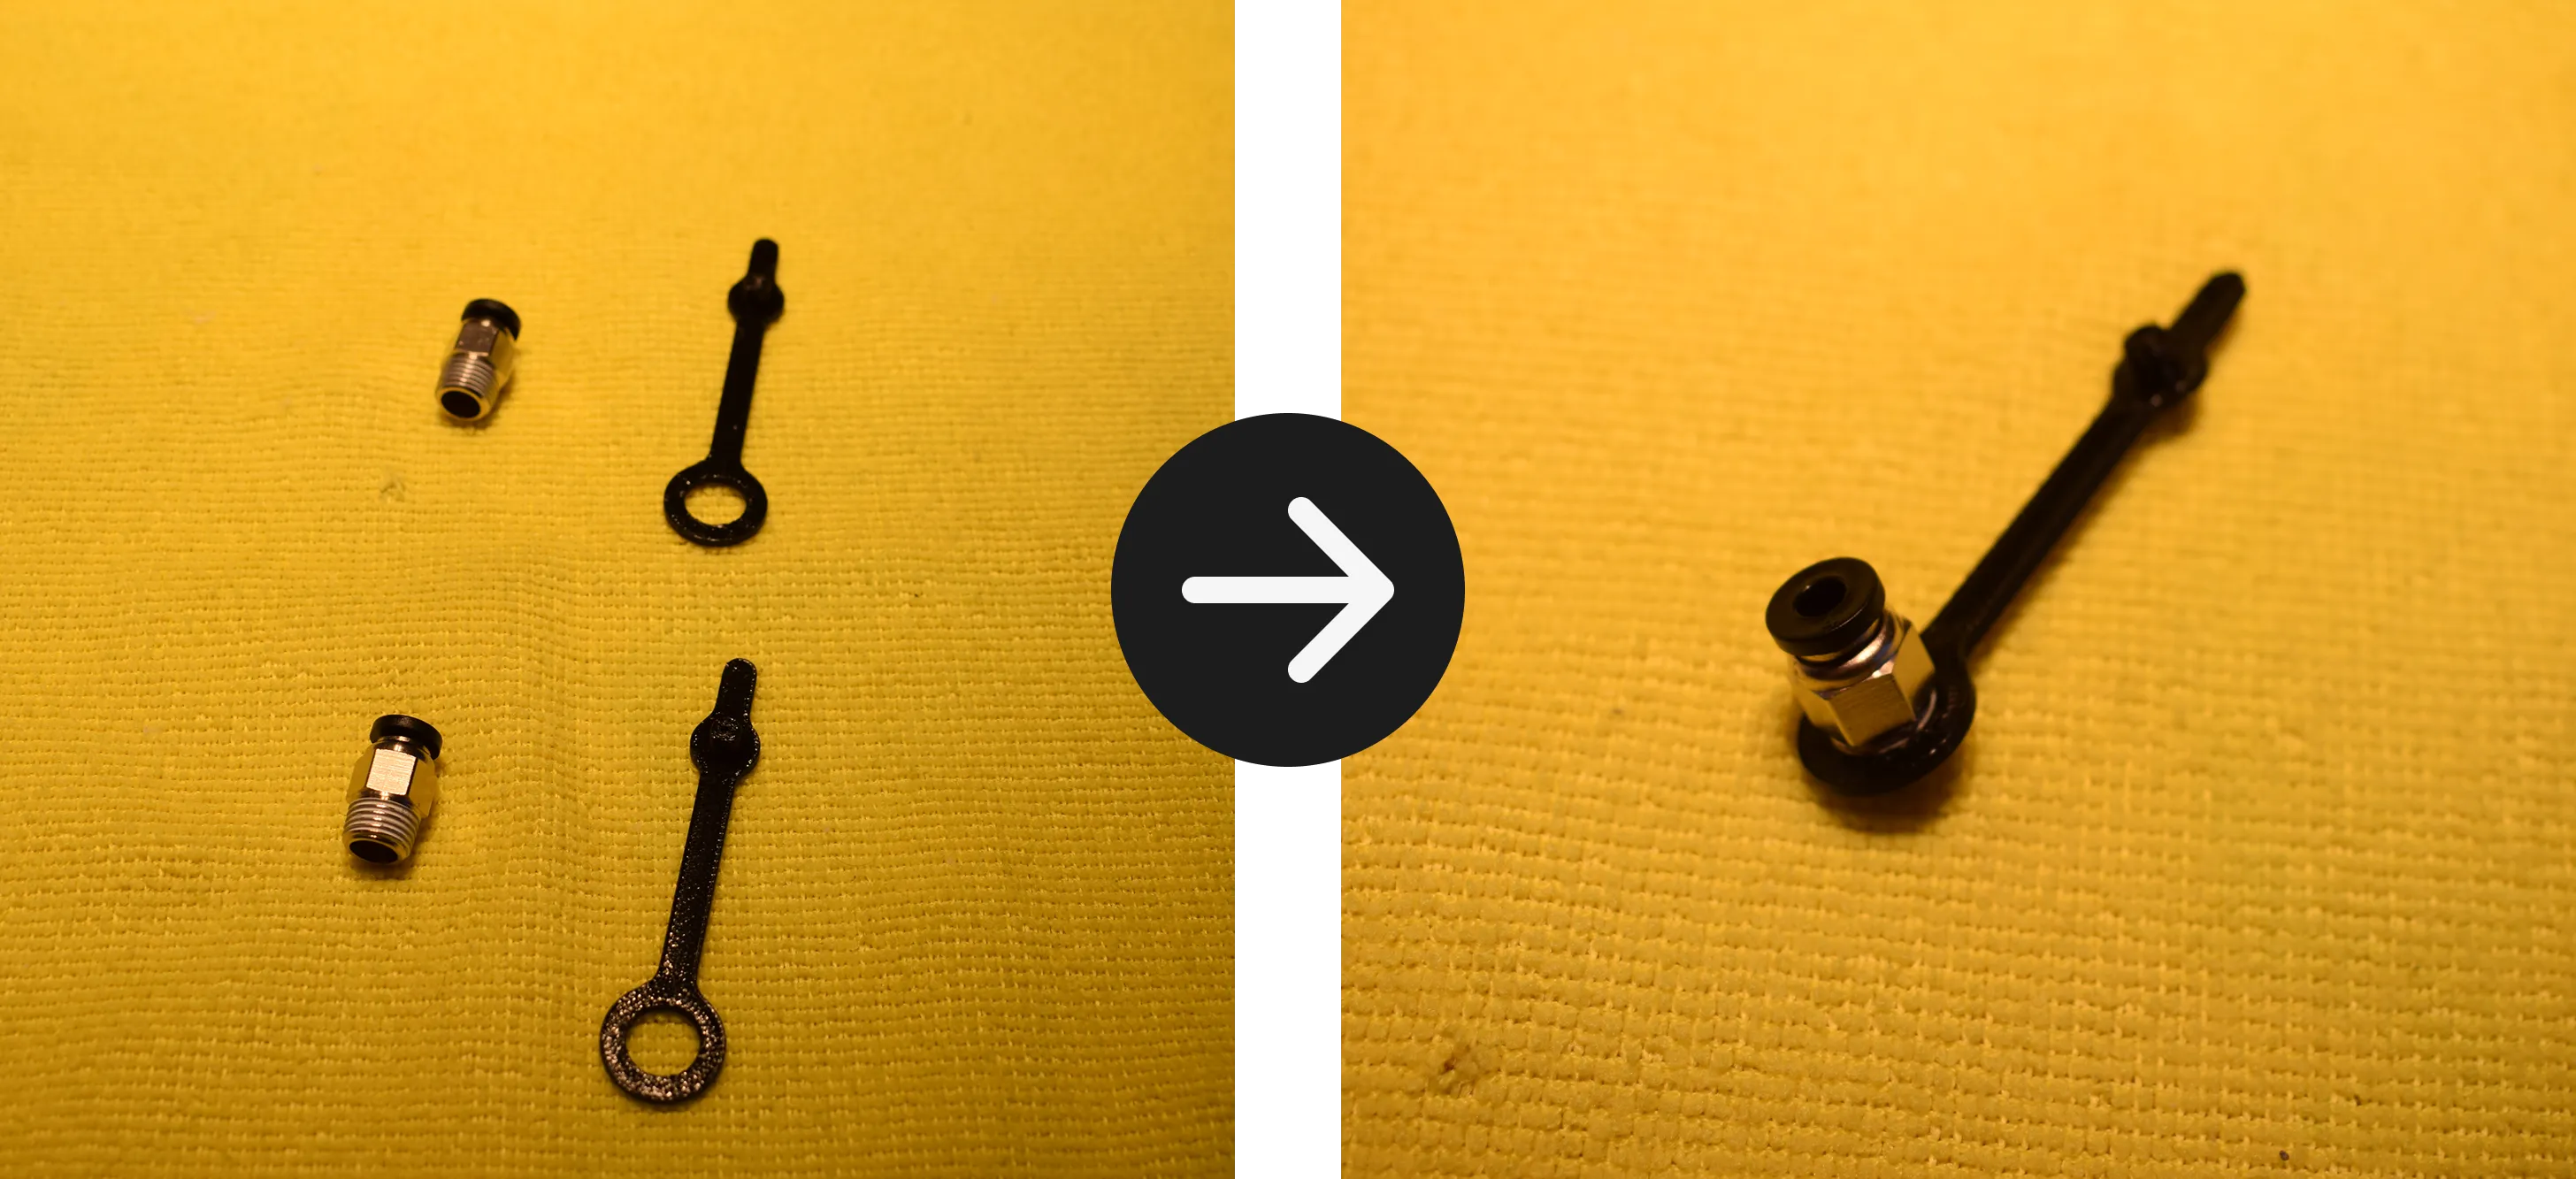
h. Take the 2x PC4-M10 pneumatic fittings and 2x rubber grommets from the small parts bag and assemble them as shown in the images below.
i. Insert the assembled pneumatic fittings into the drilled holes from the outside of the container. Using your M10 wrench, tighten them until secure.
Do not overtighten
The container is made of soft plastic and can crack under excessive force. Tighten until the fitting sits firmly in place and stop.
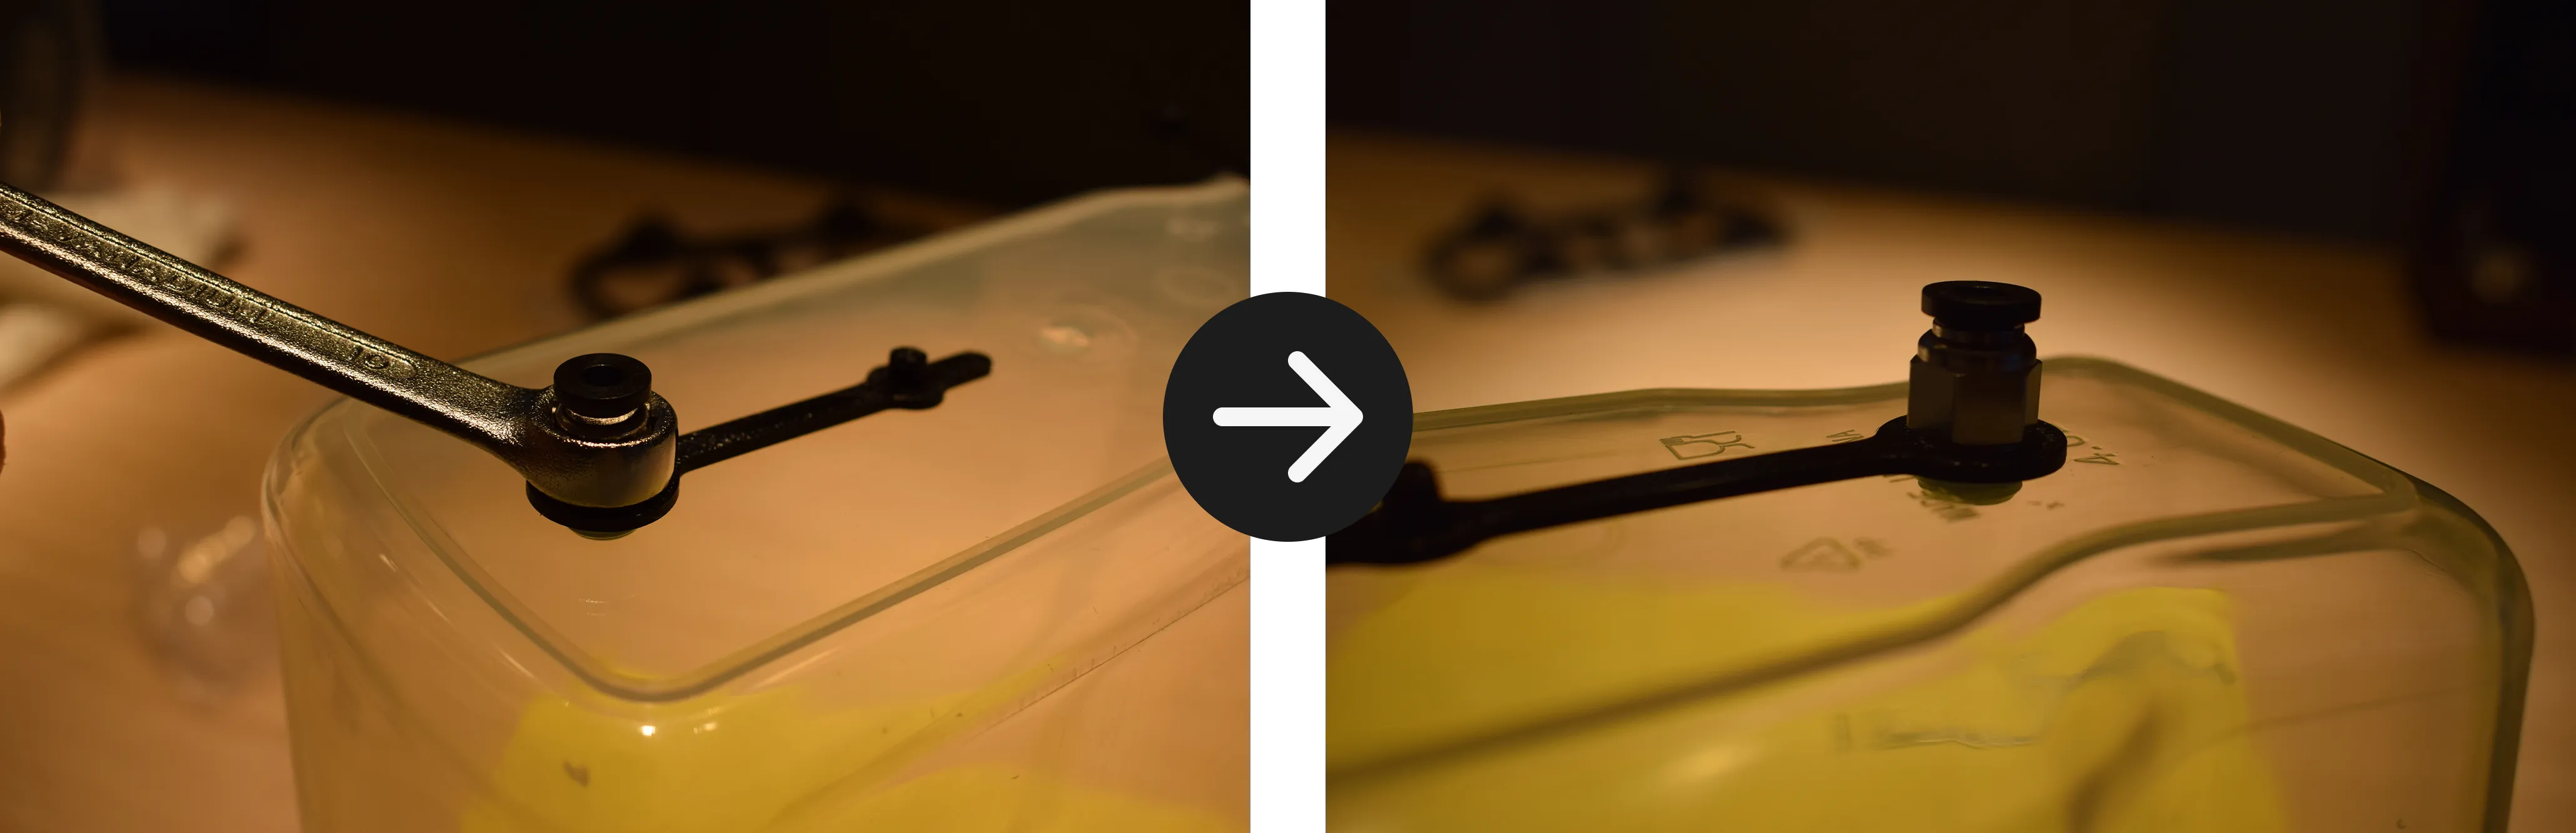
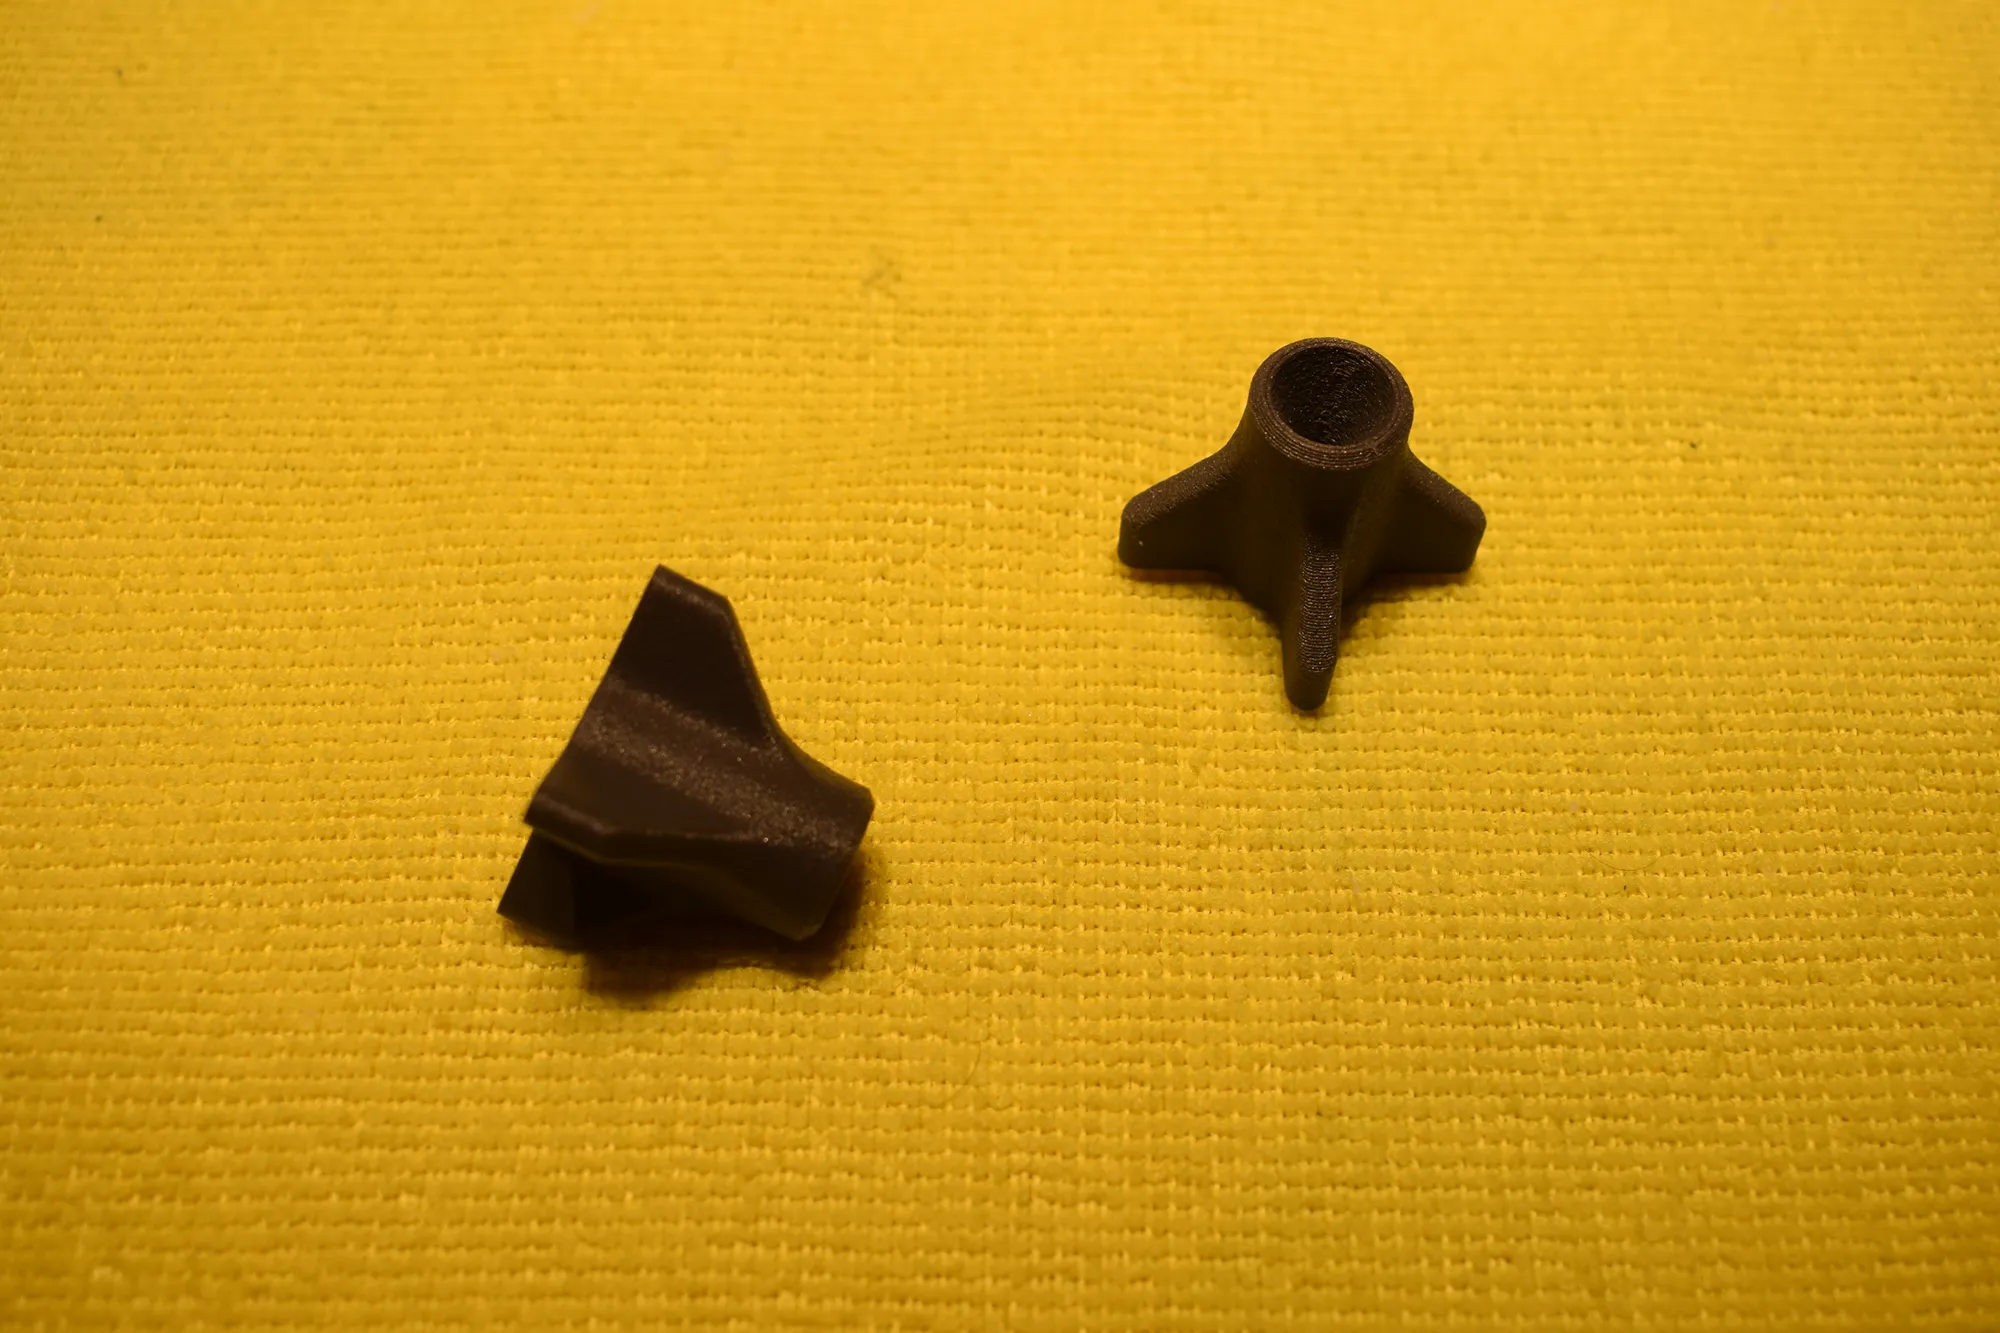
j. From inside the container, thread the 3D-printed closing fasteners onto the M10 threads of the pneumatic fittings and tighten by hand until snug.
Do not overtighten
Tighten until the fastener sits firmly against the inside wall of the container and stop.
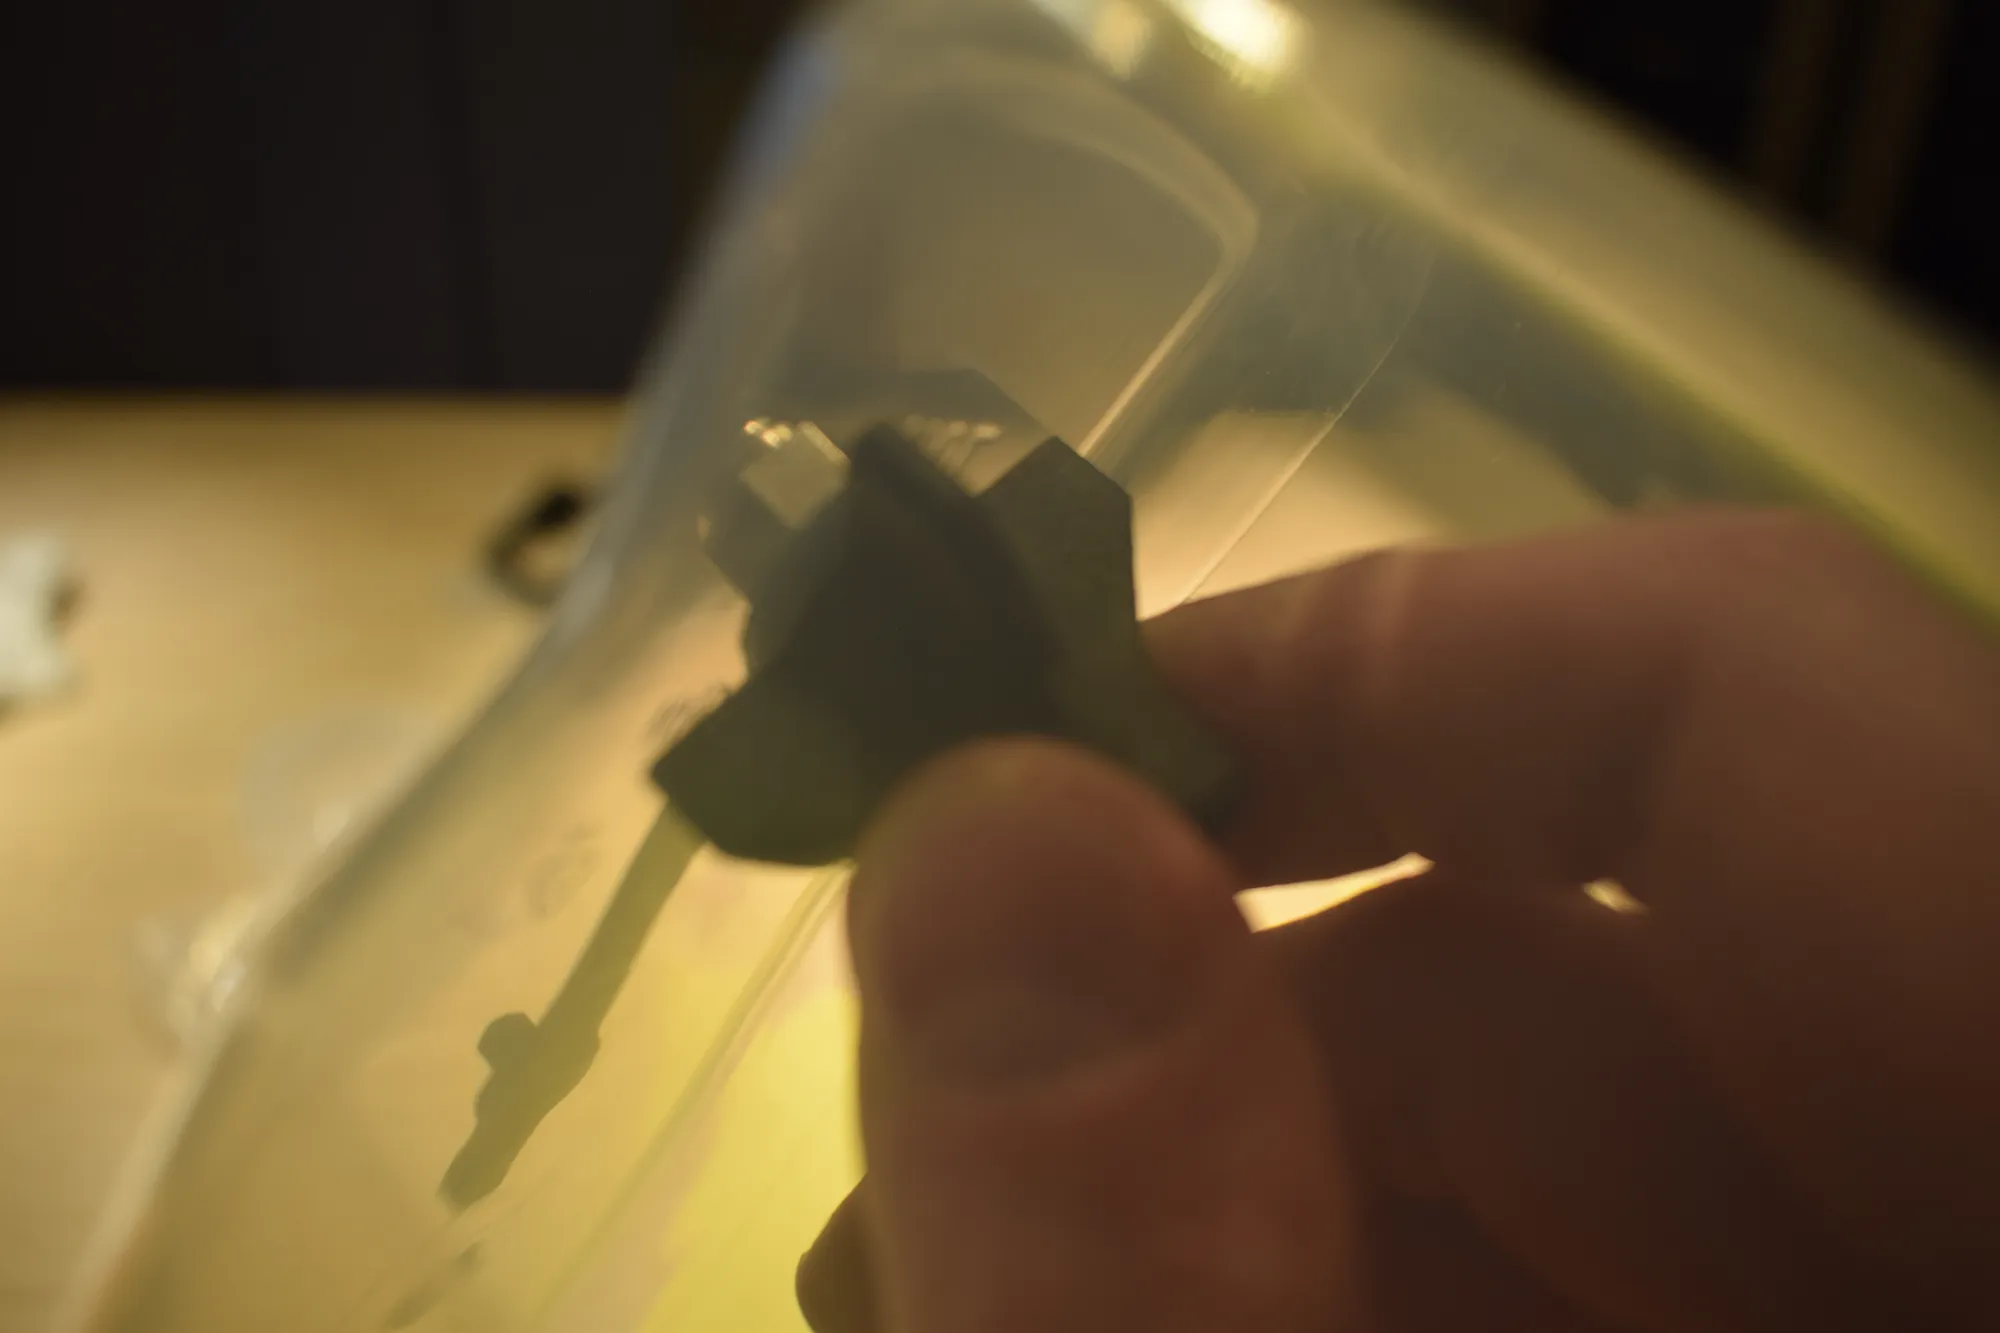
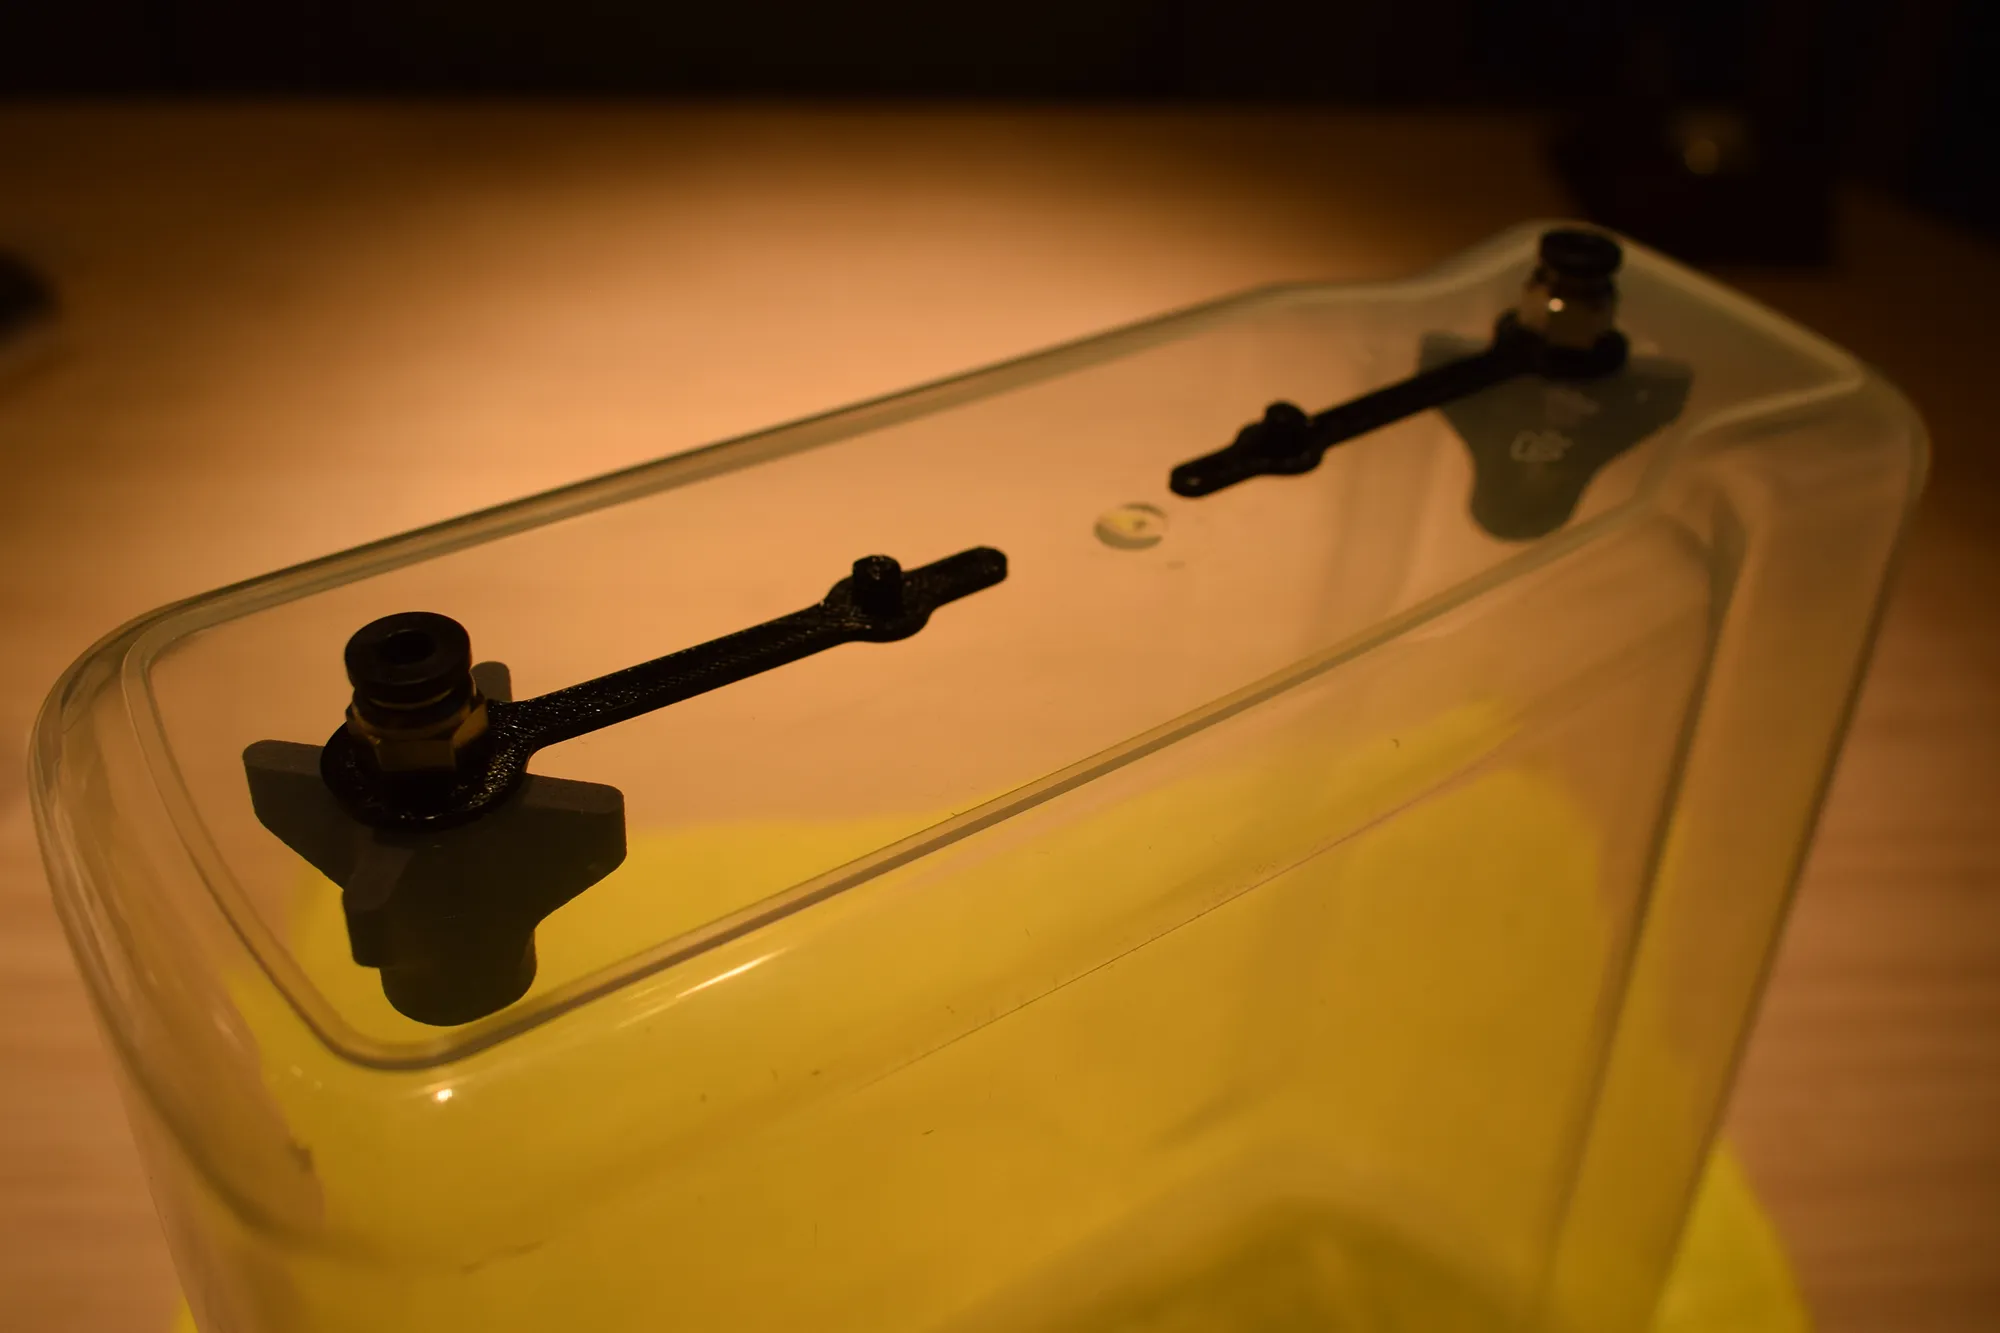
After tightening both fasteners, the result should match the image below.
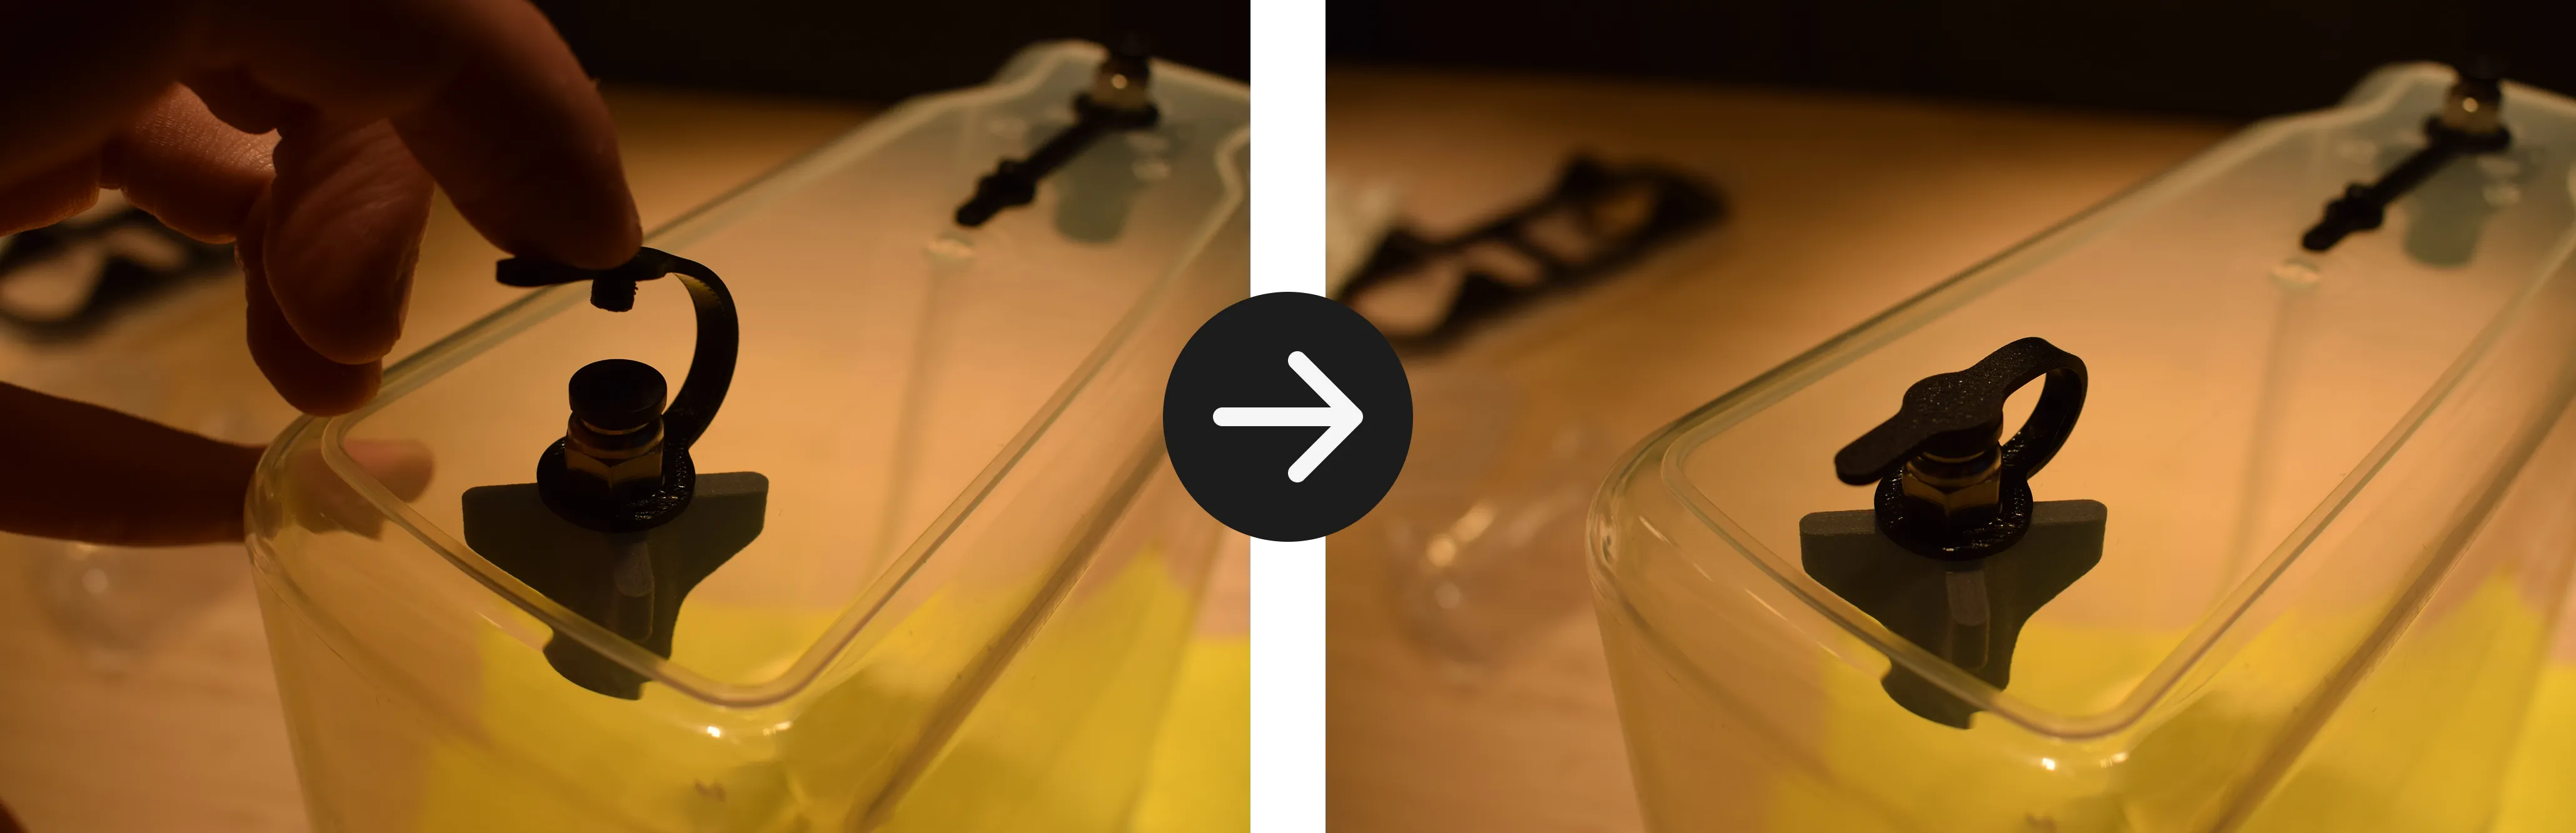
k. Bend the rubber grommet over the pneumatic fitting to close it off, as shown in the images below. This keeps the container sealed when the filament is not in use.
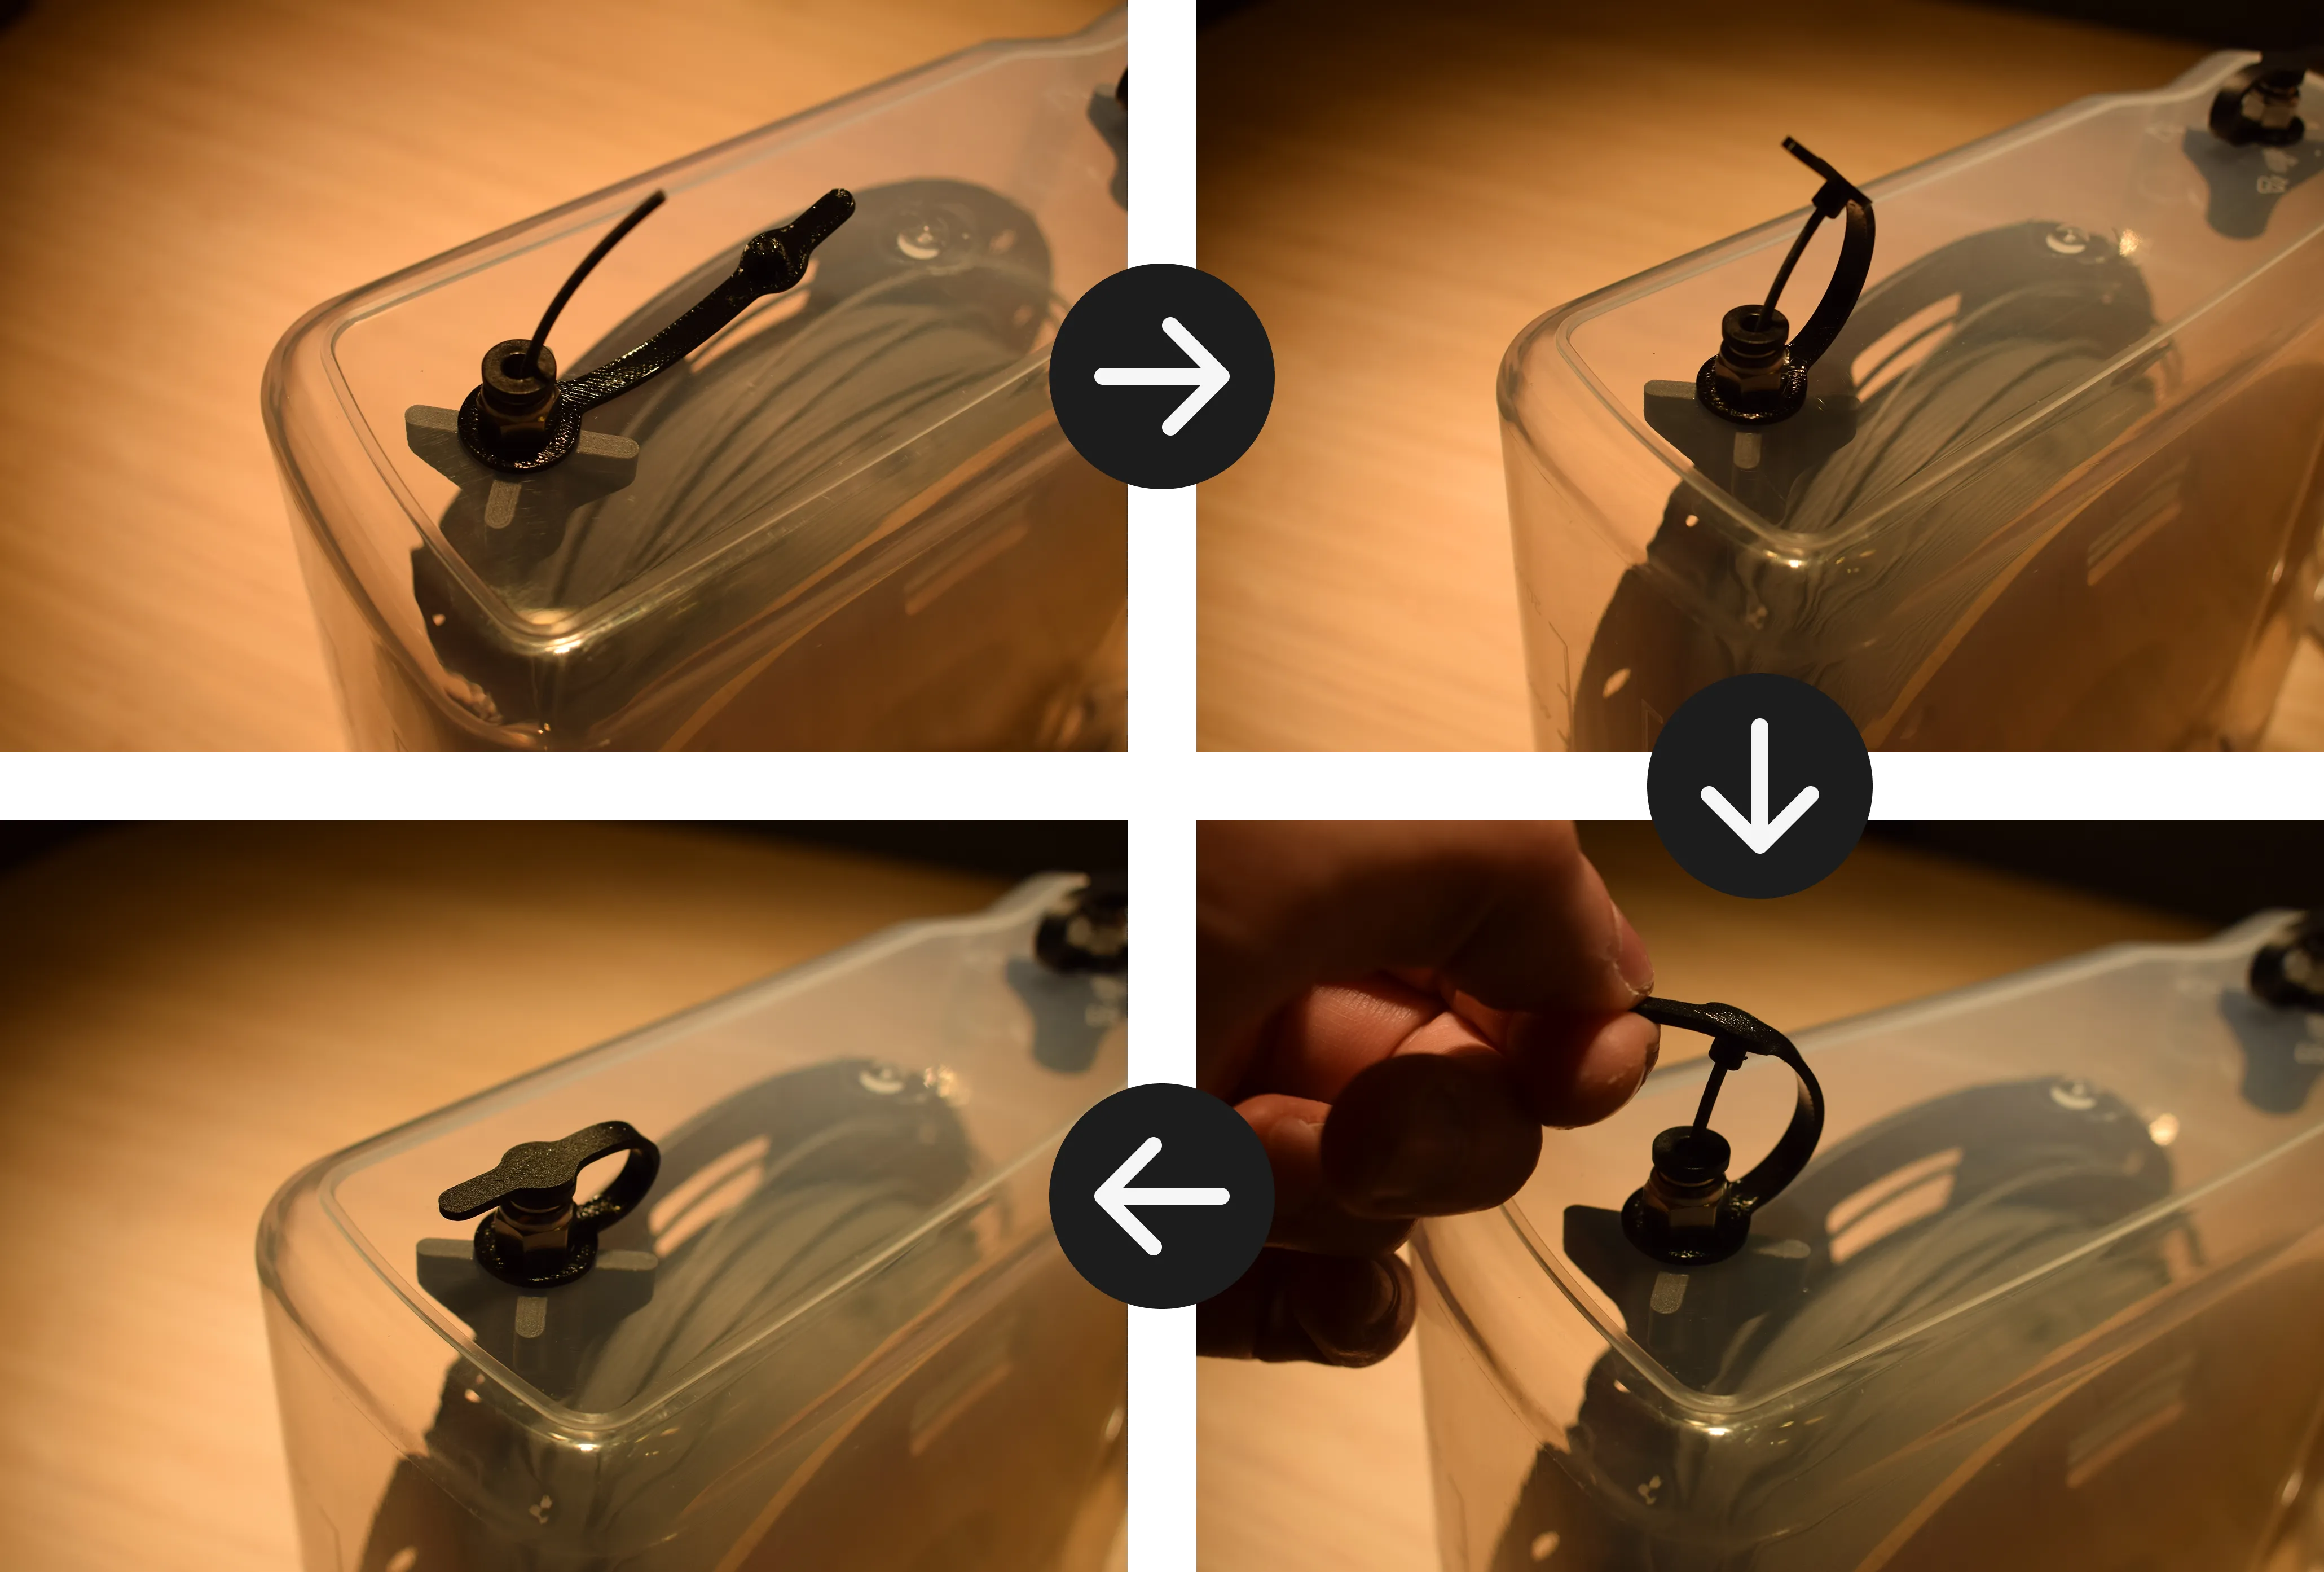
Did you know?
You can insert the end of your filament into the rubber grommet to keep it easily accessible for your next print. When you open the grommet, the filament comes with it, so there's no need to open the entire container. See the images below.
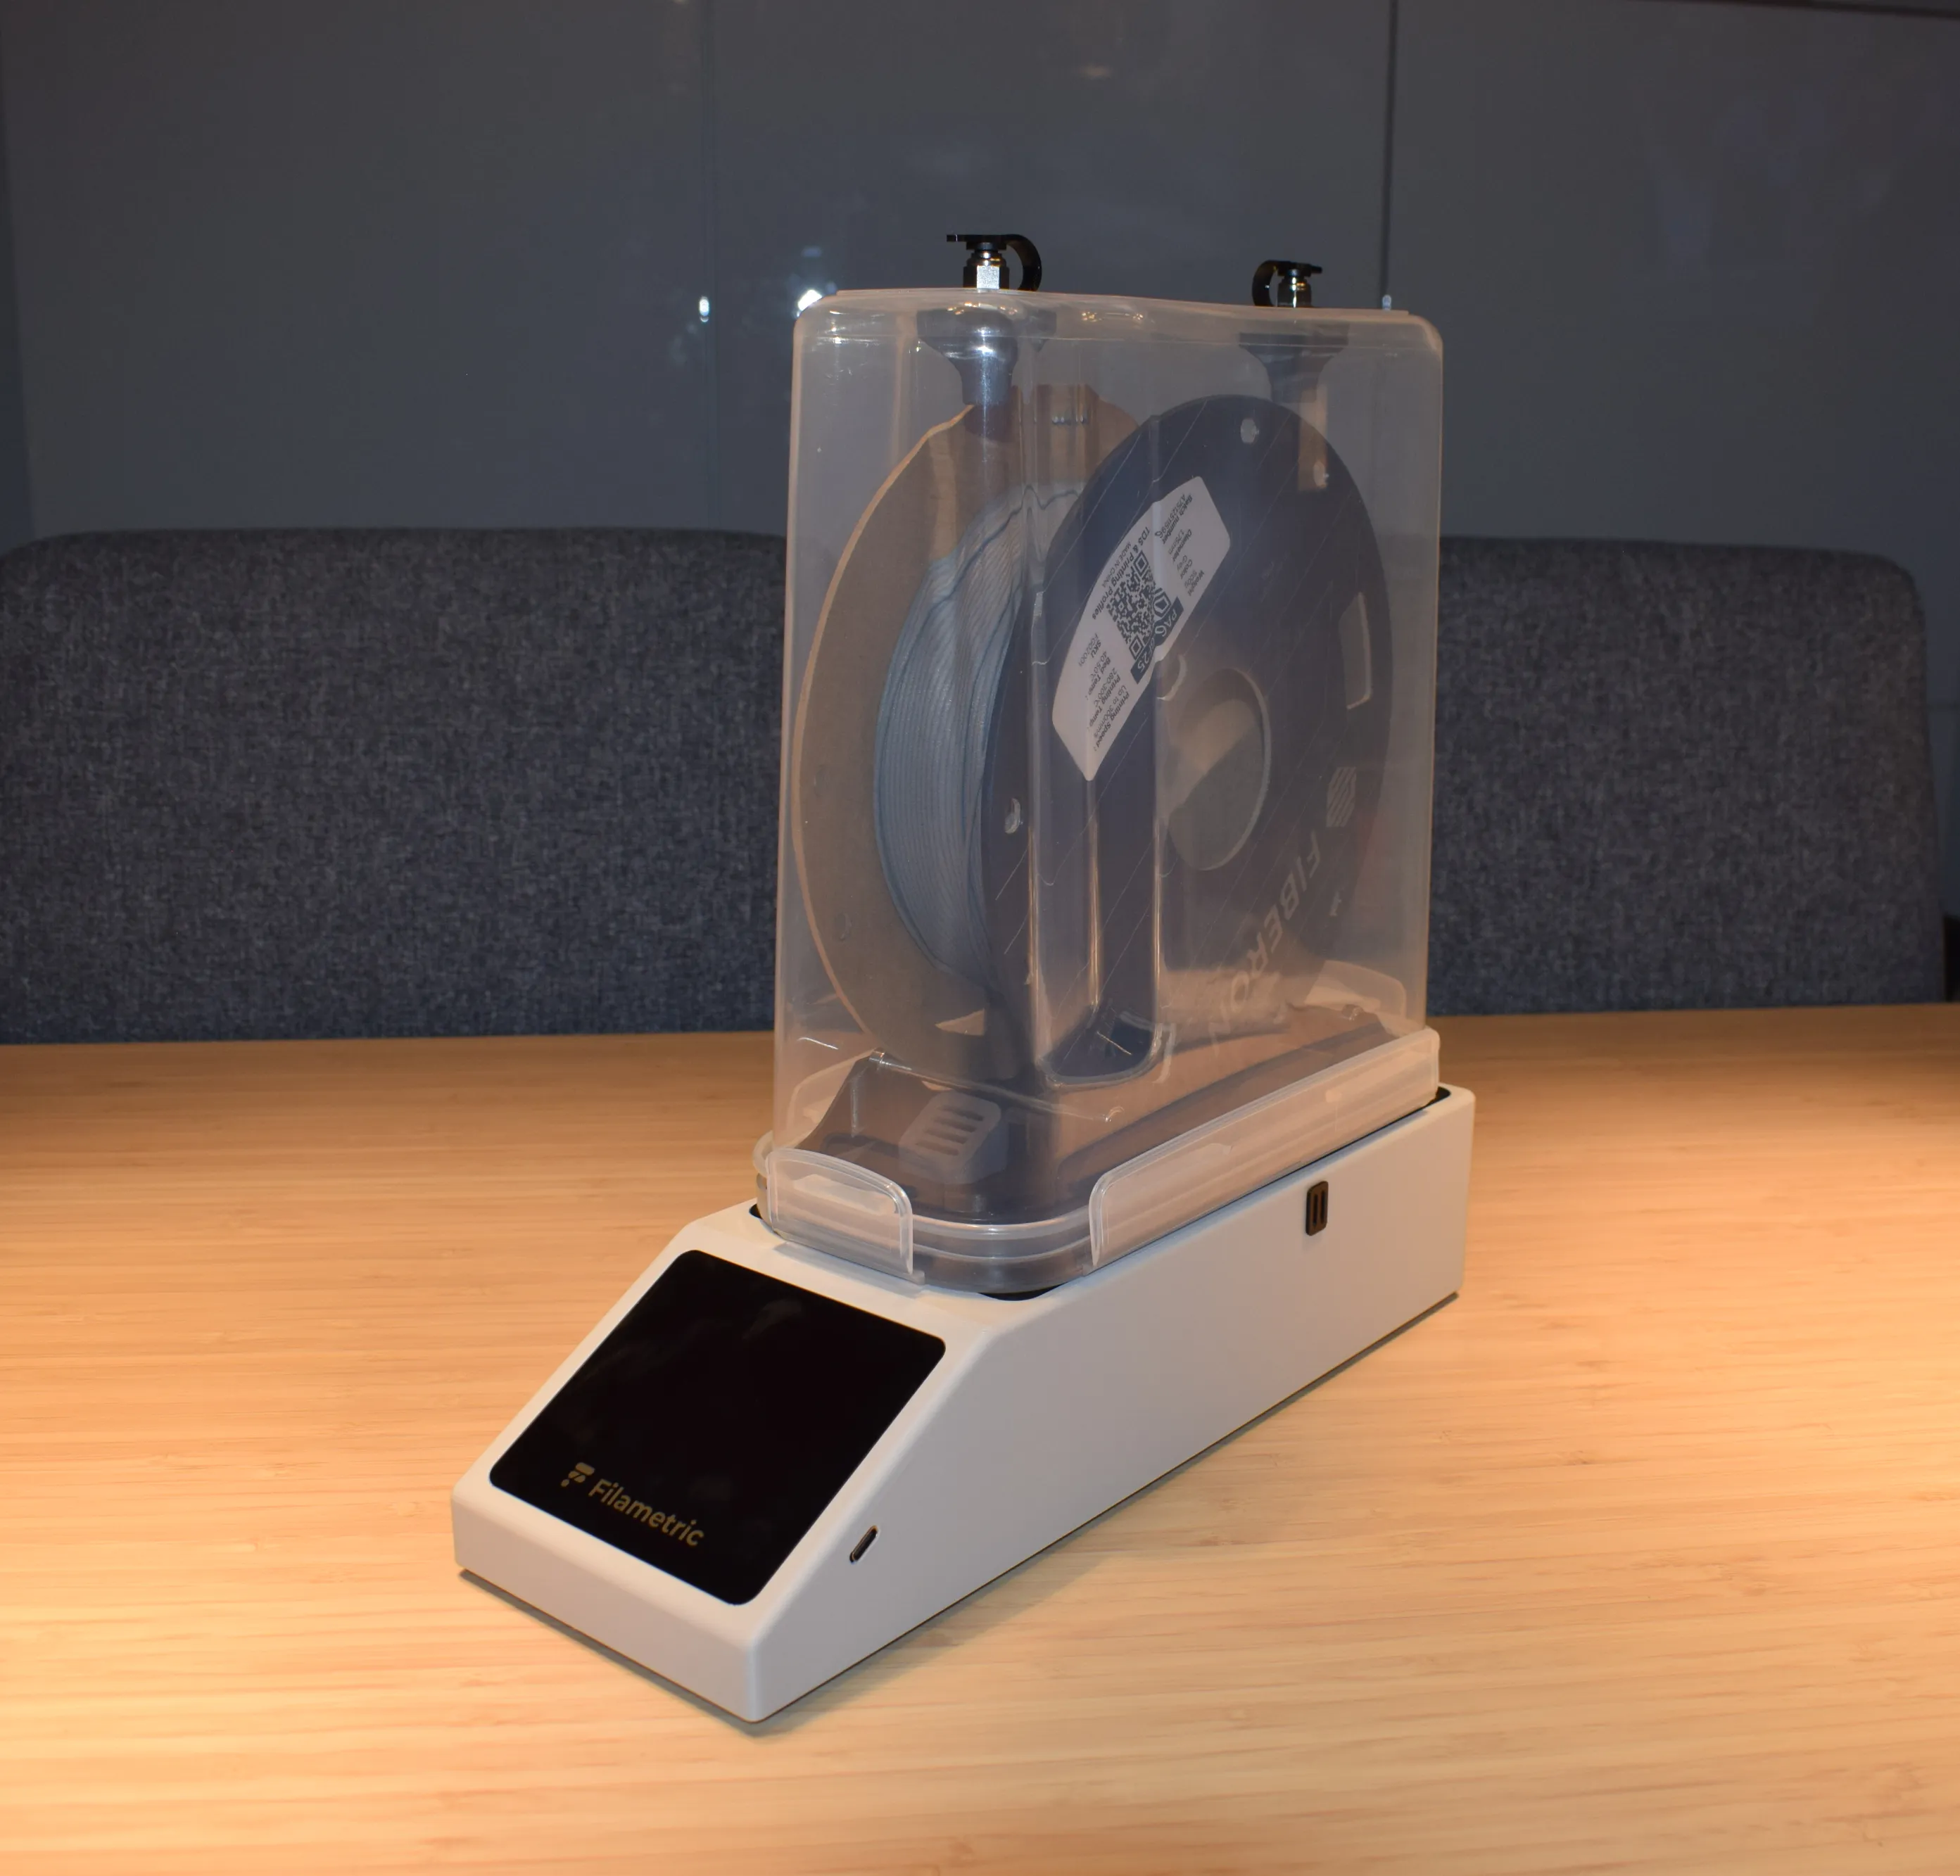
l. Place your filament spool into the container and place the drybox onto the DryBase. Make sure the 6cm opening of the drybox aligns with the container adapter on top of the DryBase, as shown in the images below.

Congratulations! You have fully assembled both the DryBase and the drybox.
Your setup is now complete and ready for use. To print while drying, use the included PTFE tube to connect the drybox to your 3D printer. When storing the drybox, make sure to close both grommets and reinstall the round cap on the container lid to keep the container sealed. Take a moment to verify the following:
- Both shafts are seated in the spool holder with an audible click
- The spool holder is inserted into the lid opening
- The pneumatic fittings are secured with the wrench and closing fasteners
- The grommets are closed when not in use
- The drybox sits flat on the DryBase with the opening aligned
Need help?
If you run into any issues, reach out at support@filametric.com. We're happy to help.